Navigation
Navigation in the Guru Maps app allows you to find optimized multi-stop routes and receive turn-by-turn voice directions even when you don't have an internet connection.
To use navigation offline, ensure that you have downloaded the necessary maps and navigation data for the area you'll be navigating in: Settings > Download Maps.
Create a route
1. Define a destination
To calculate a route, define your destination by searching for an address or point of interest, dropping a pin on the map, or choosing a saved place from the My Collections list:
- Tap and hold the location on the map you want to use as the destination until the pop-up appears, then choose the
 icon:
icon:

- Swipe right on a marker name in the My Collections list, then tap the icon:

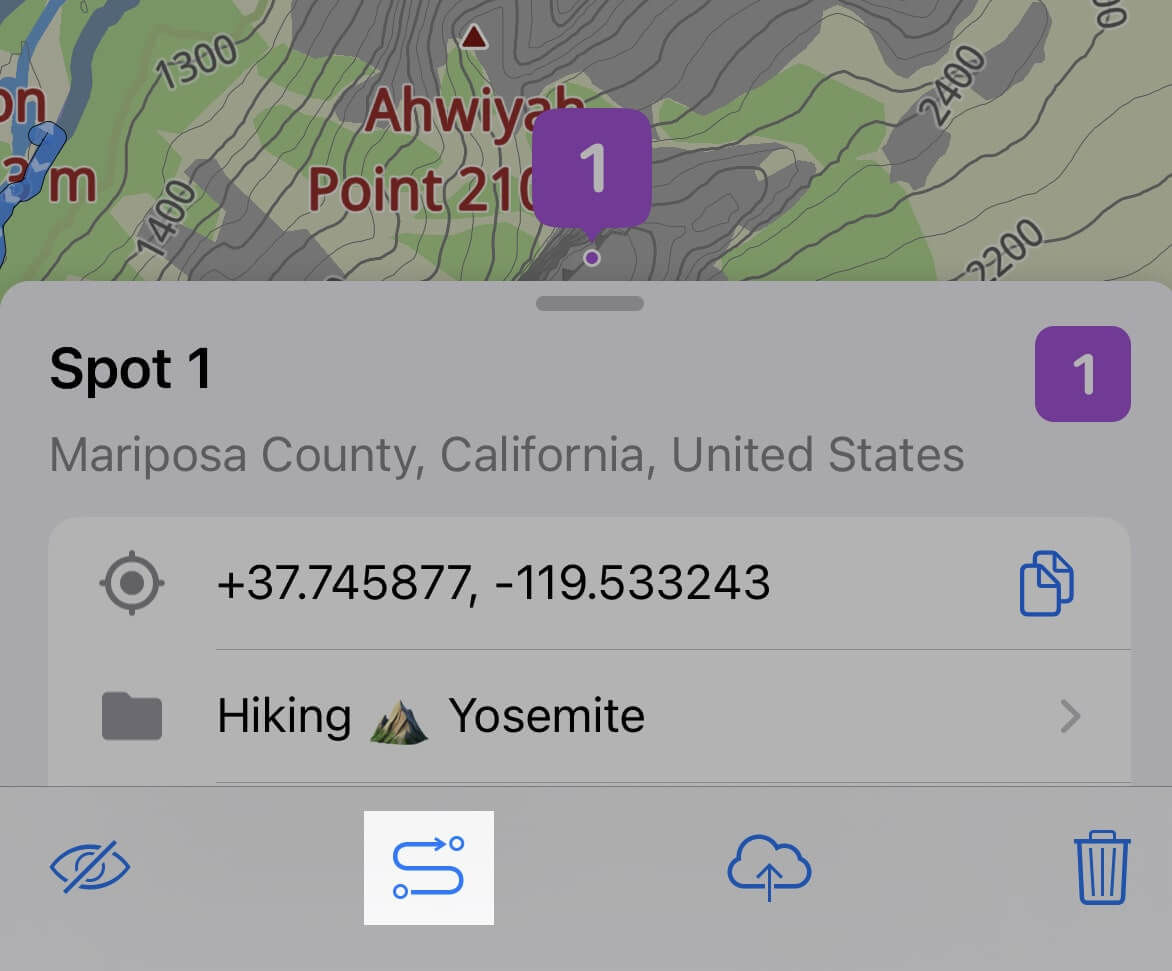
- Tap the POI on the map and tap the
 icon in the details panel at the bottom:
2. Choose a navigation mode
Guru Maps provides directions for several modes of transportation:
- Driving
- Walking
- Cycling
- Motorcycling
- Truck
- Straight line (direct path)

By default, the route is displayed in driving mode, but you can select the right mode for your needs.
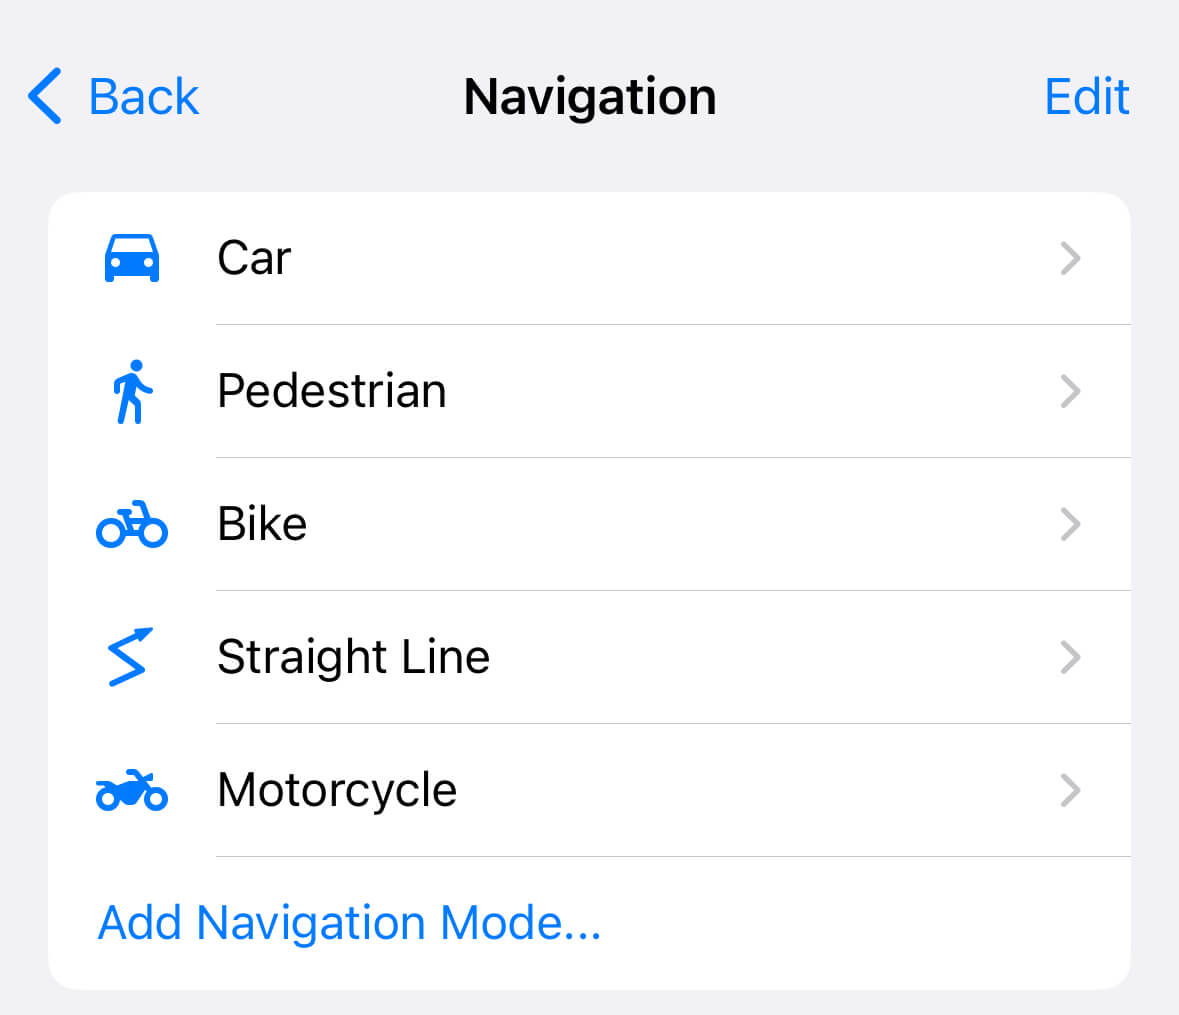
To add additional navigation modes in Guru Maps:
- On the route planning screen, tap the three-dots icon to open the menu.
- Select "Open Navigation Settings".
- Tap Add Navigation Mode, and choose the modes you want to add to your navigation options.
Preview a route
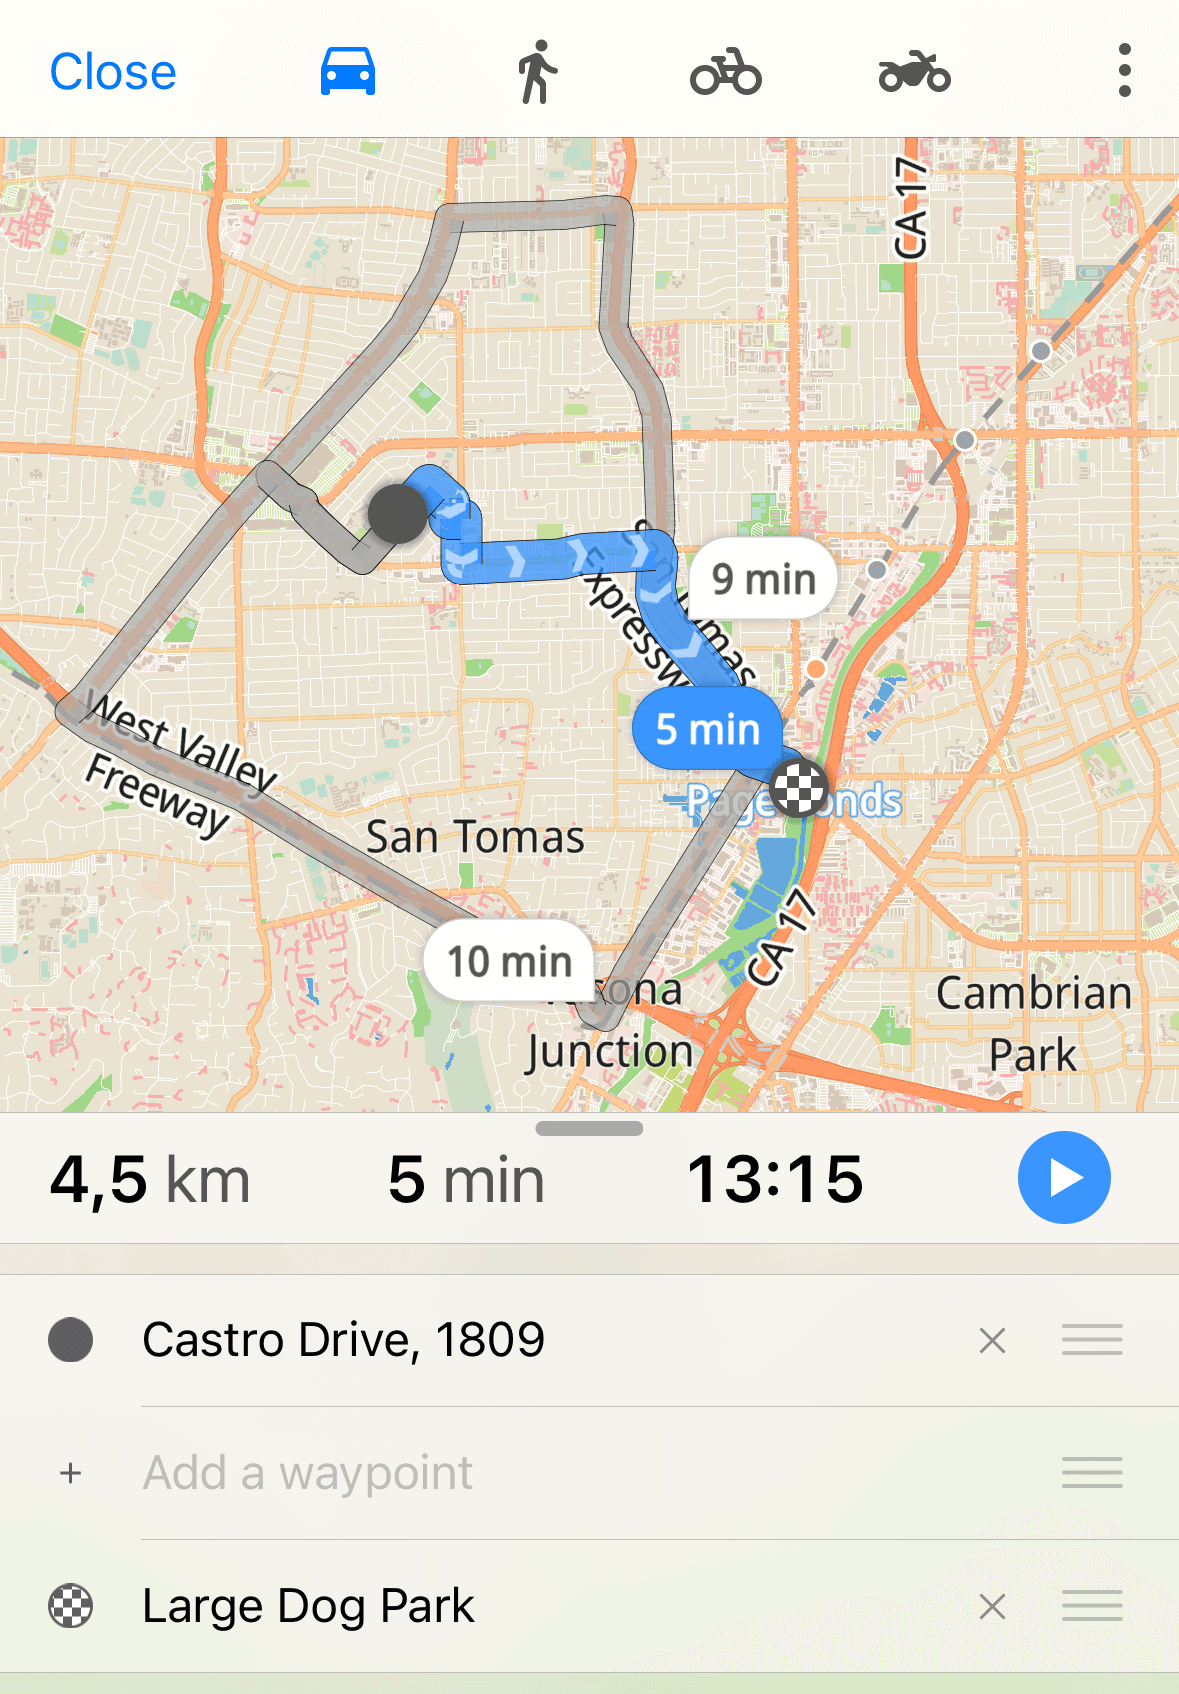
By default, a route from your current location is generated automatically, providing the best alternatives based on trip time and the route options chosen in Settings > Navigation.
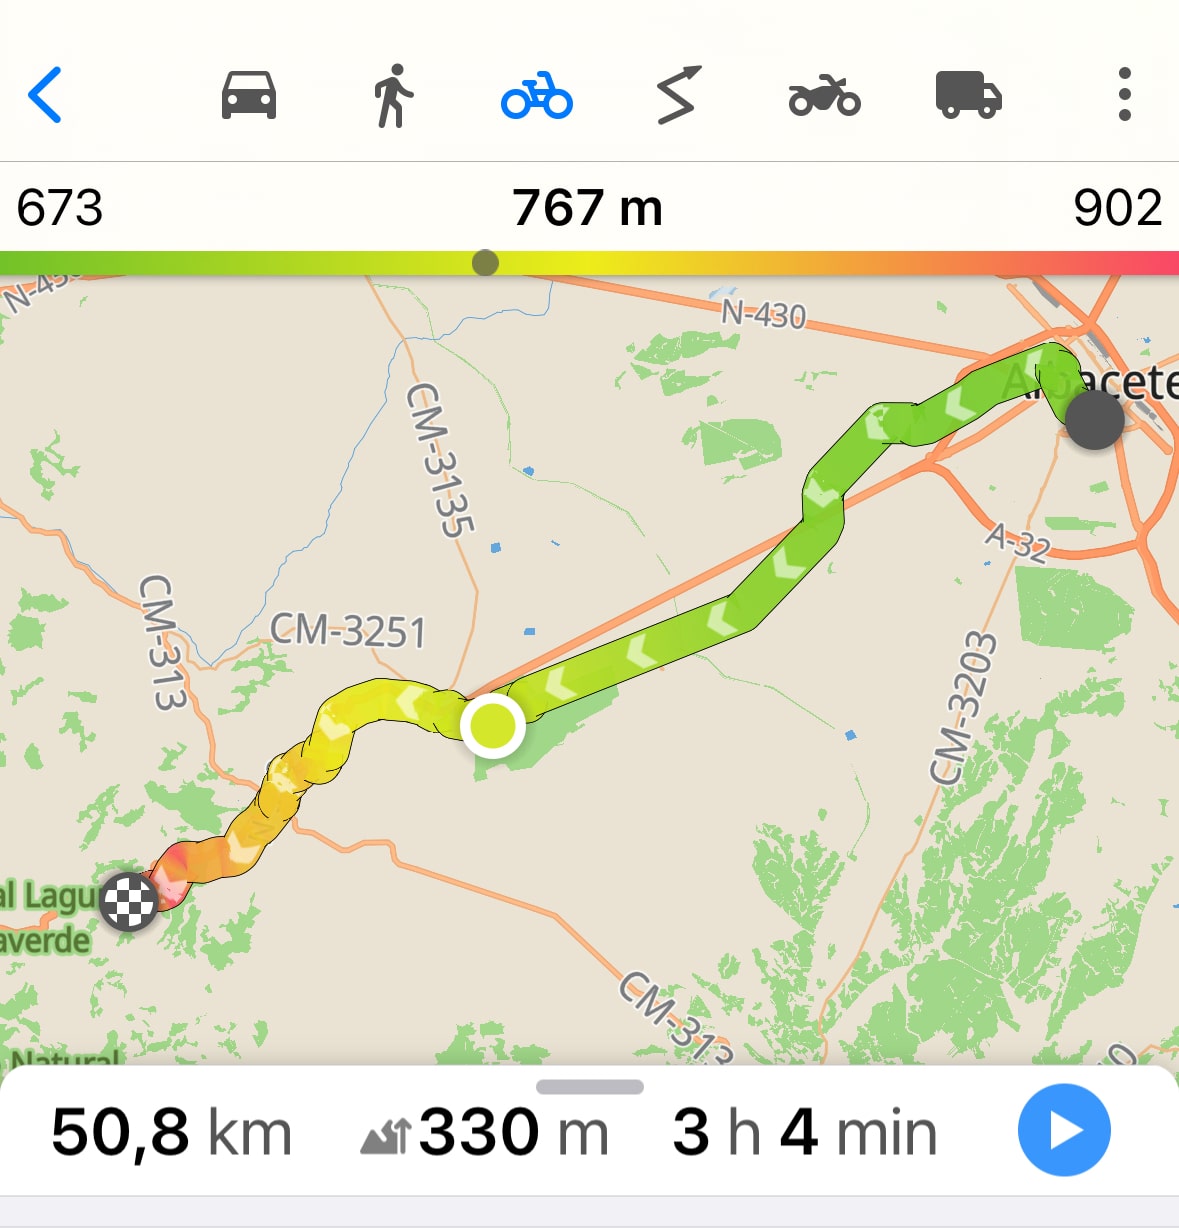
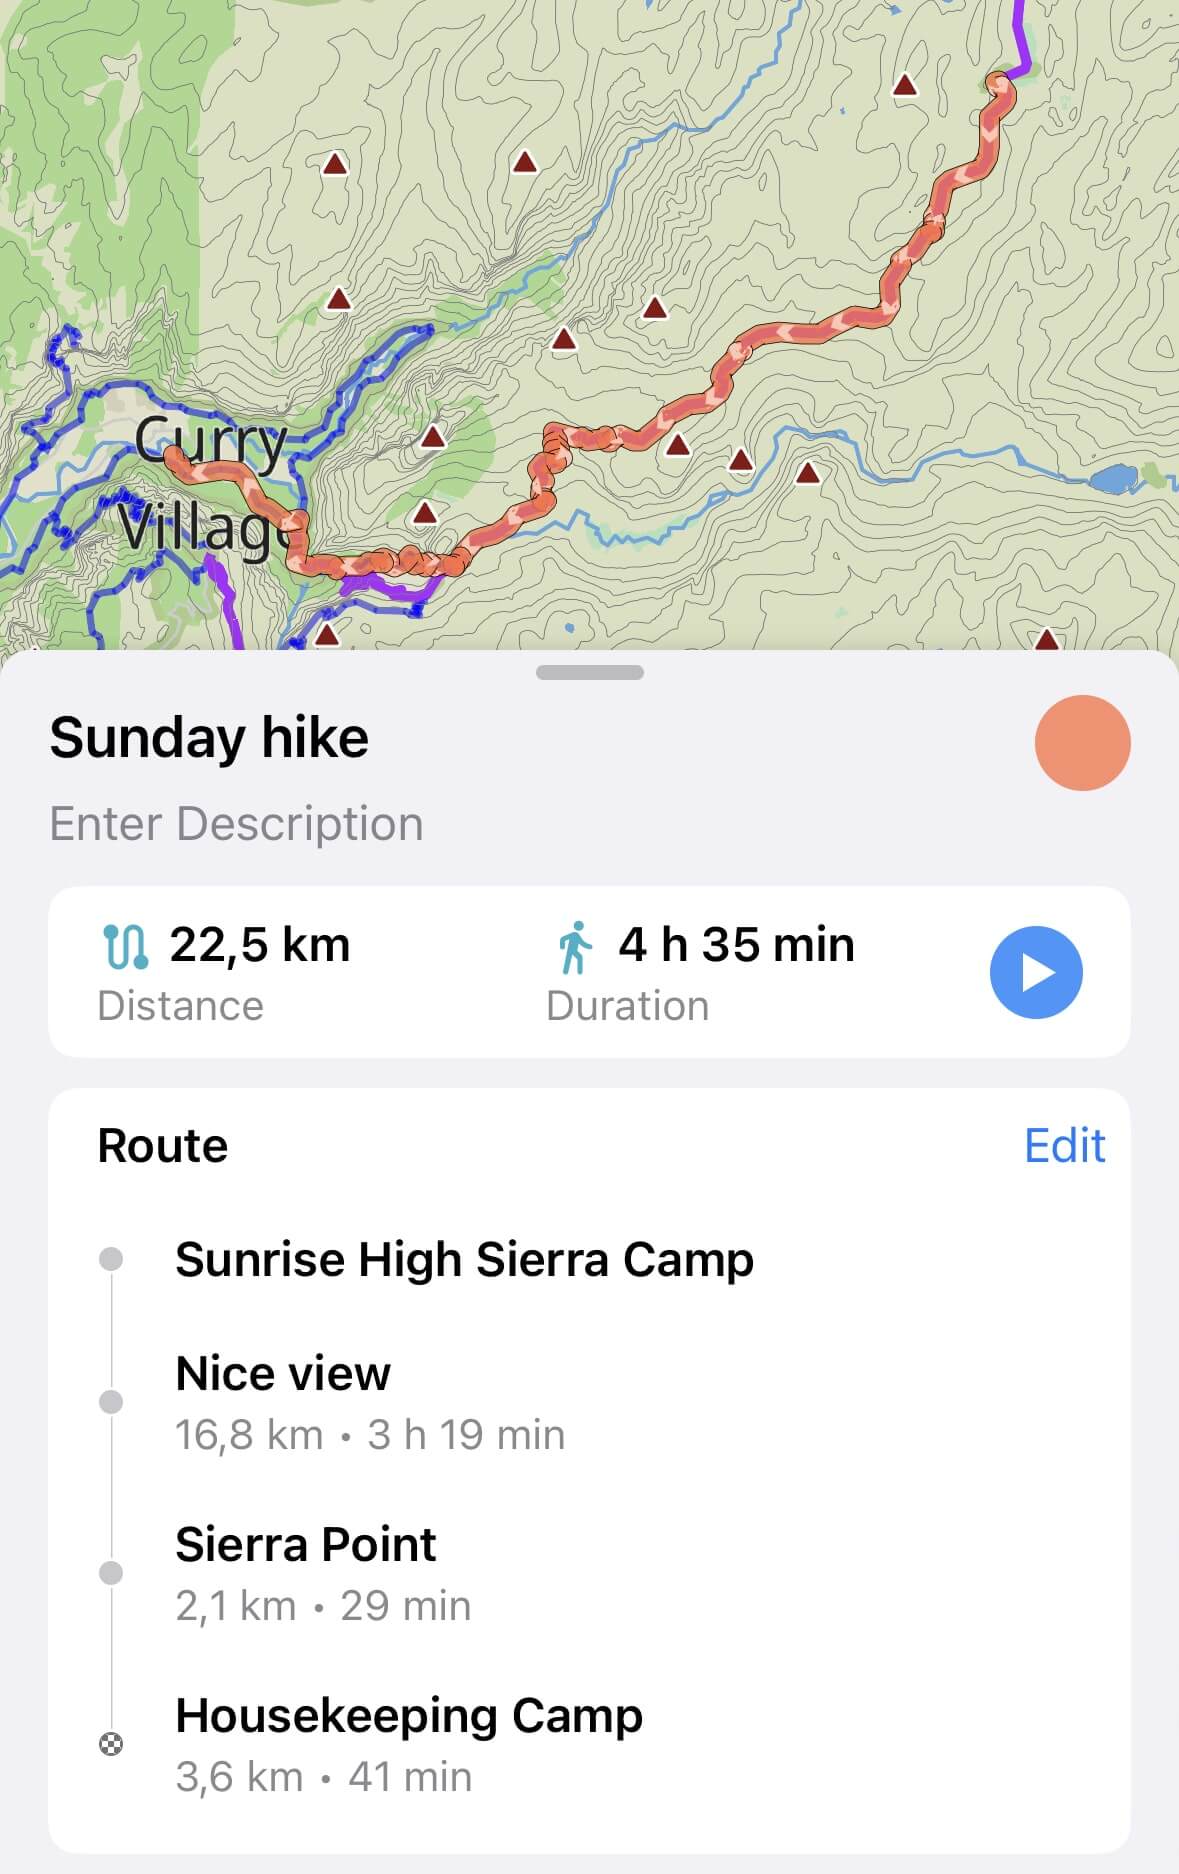
A map preview with your route outlined in blue will appear, along with some route details at the bottom: travel distance, travel time, and arrival time:
Guru Maps calculates routes using the fastest route model, which is primarily based on travel time, but the algorithm also considers factors such as navigation settings, distance, and the number of turns.
In hiking and cycling modes, an estimated elevation gain is displayed along the route:
Add waypoints
Waypoints in Guru Maps are additional stops that you can add along your route. Use them to mark places you want to visit and enhance your trip planning and navigation experience.
In Guru Maps, you can add waypoints to a route using two different methods:
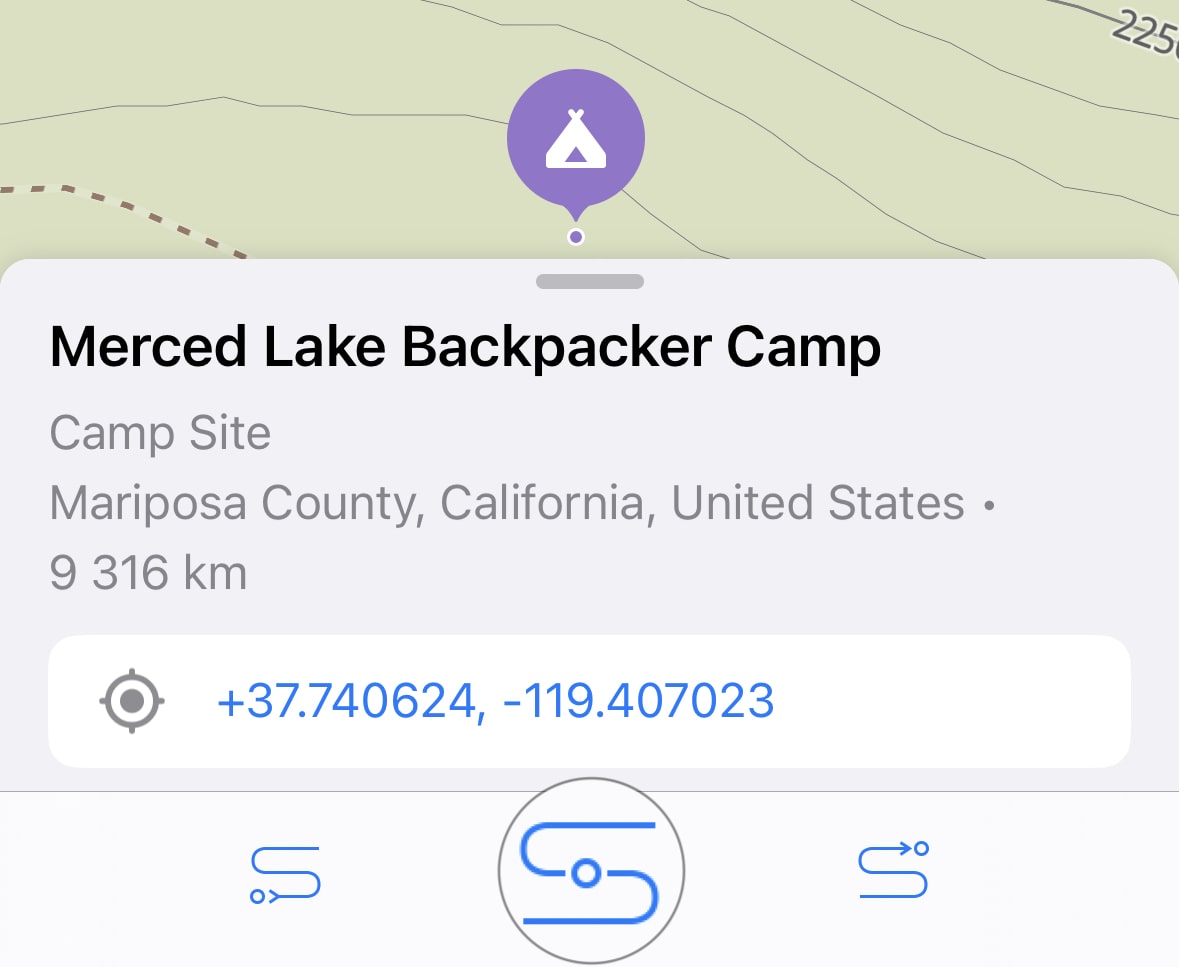
- On the route preview, tap and hold a specific location you want to add as a waypoint until a menu pops up. From the menu, select how to add the location to your route (from left to right):
- set as beginning,
- set as intermediate,
- add as end.

- Tap Add a waypoint in the list of destinations for your route to access the search functionality.
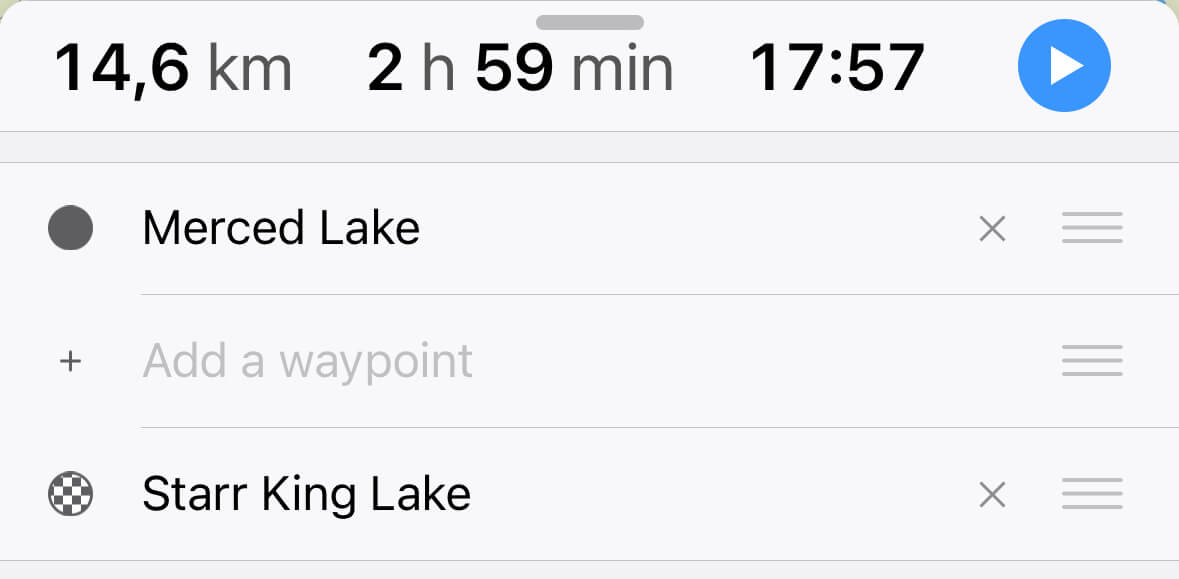
Search for the waypoint you want to add and add it to your route as a starting, intermediate, or end point from the place details bar at the bottom:
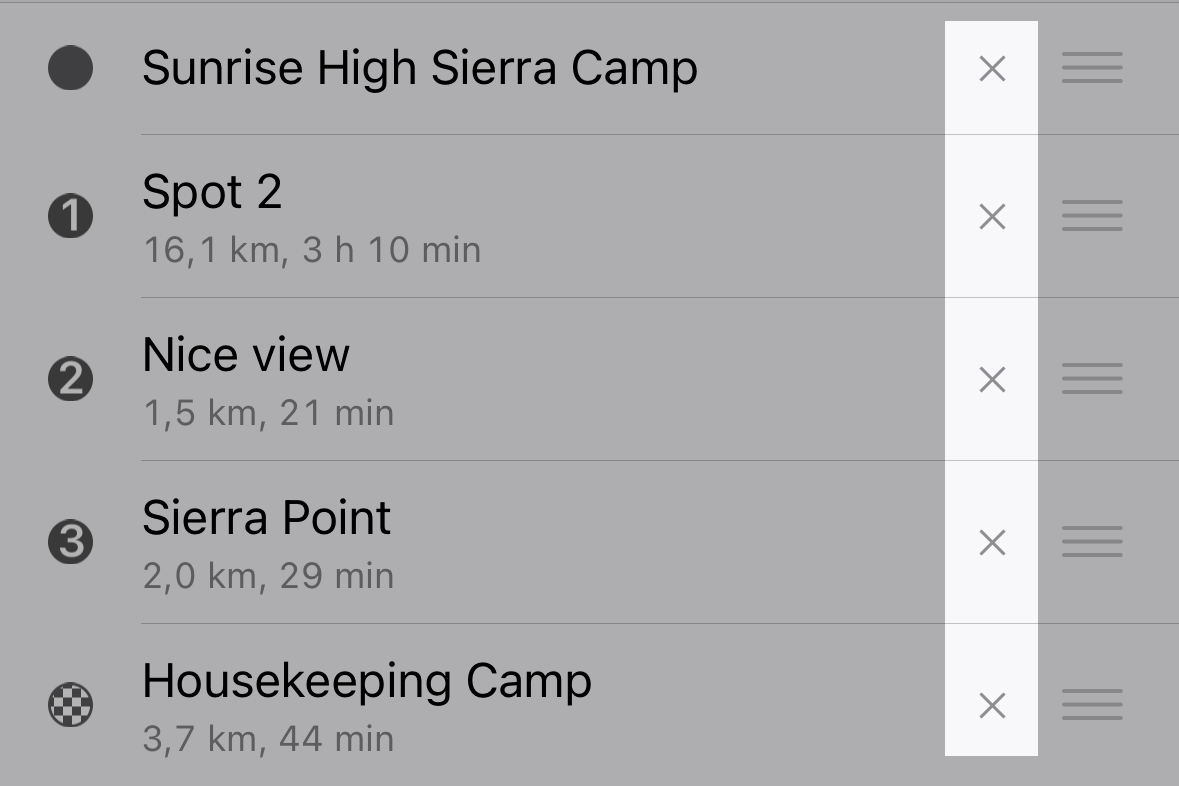
The route adjusts automatically after you add a waypoint. Once the route is calculated, you can drag and drop via points on the map or reorder them directly from the list to recalculate the route dynamically.
To clear any of the route points, do one of the following:
- Tap the map point to bring up the remove action:
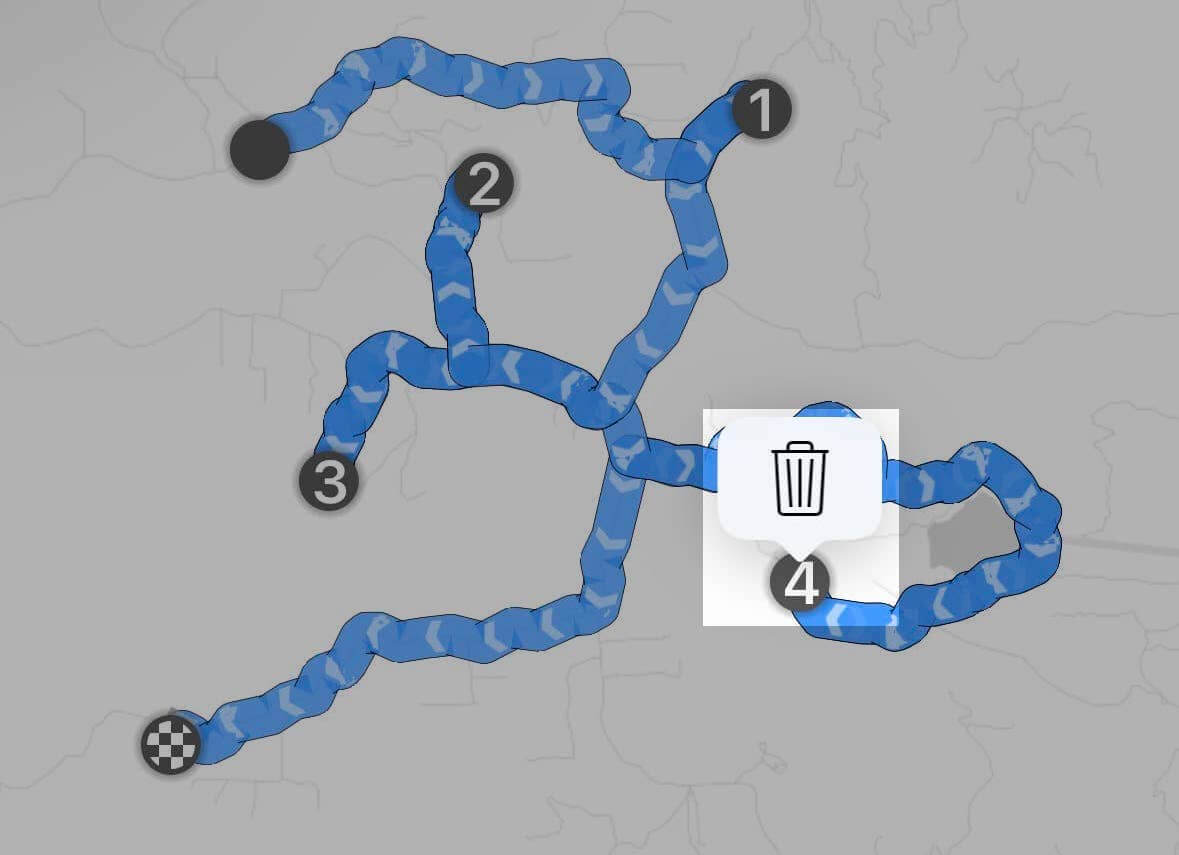
- Tap the "X" icon next to the point name in the list:
The service error message "Path distance exceeds the max distance limit" appears when the route is greater than the service limits:
Car • Online: 150 points or 10000km • Offline: 50 points or 2000km
Cycle • Online: 100 points or 1000km • Offline: 50 points or 500km
Pedestrian • Online: 150 points or 500km • Offline: 50 points or 500km
Motorcycle • Online: 150 points or 10000km • Offline: 50 points or 2000km
Truck • Online: 150 points or 10000km • Offline: 50 points or 2000km
Save a route
To save a route for future use in Guru Maps, tap the three-dots icon on the route preview screen to open the menu, and select the "Save Route" option.
The route will then be saved in My Collections list for future access.
Optimize a route
In the Guru Maps app, if you have multiple waypoints in your route, you can obtain the most efficient path possible. By rearranging the order of the waypoints, Guru Maps optimizes the route to minimize travel time.
To get a route with the shortest travel time, tap the three-dots button in the top right corner of the route preview screen and select Optimize Route.
The optimization feature in Guru Maps requires at least two waypoints added and has a limit of up to 50 intermediate waypoints in your route.
Other route options
To access more route options, tap the three-dots icon located in the top right corner of the route planner screen.
From there, you can choose from the following options:
- Change Map Source: This option allows you to select between using an offline or online map. Additionally, you can enable or disable the display of overlays on the map.
- Open Navigation Settings: Adjust various navigation settings without exiting the route set mode. After you make adjustments, your route is recalculated to reflect your preferences.
- Open Search: Search for specific locations and show them on the map. Use this feature to find and add waypoints to your route.
- Clear Search: This option will hide the search results from the map view.
Navigate a route
To begin navigation, tap the ![]() icon. After the route starts, you can:
icon. After the route starts, you can:
- Skip the next waypoint and continue to the following one or directly to your destination by tapping the
 icon:
icon:

- Stop or edit your route, or turn off voice guidance by tapping the appropriate icon in the expandable menu at the bottom:

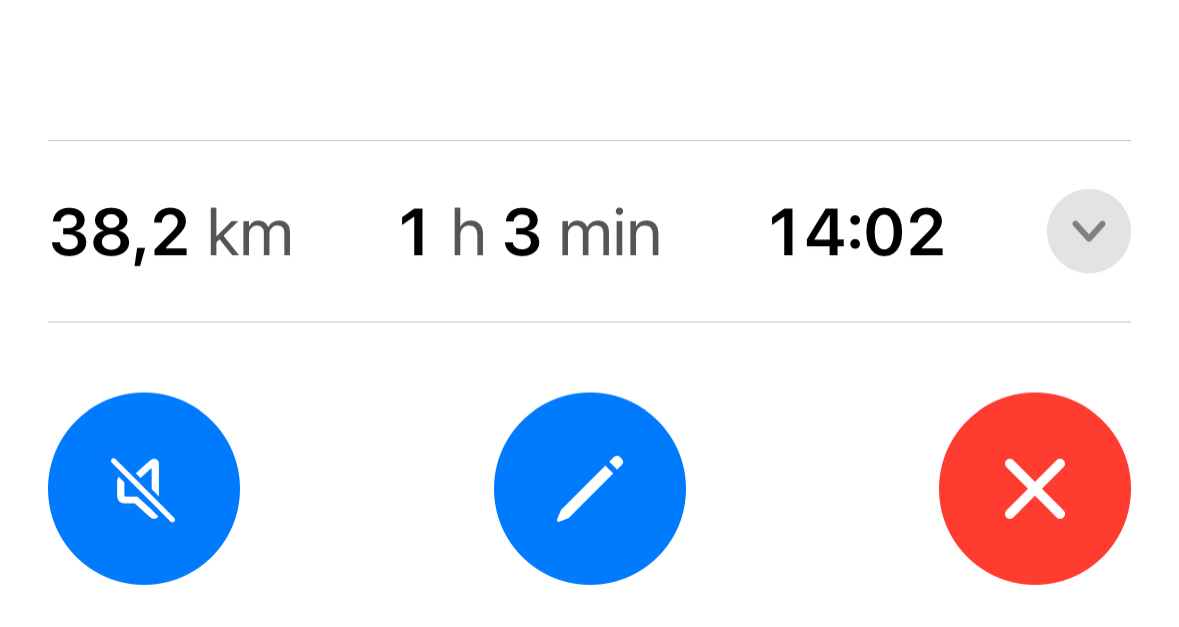
If you miss a turn or intentionally deviate from the planned route in Guru Maps, the app will automatically recalculate a new route for you.
Voice instructions
When you’re navigating to a place, you hear voice directions. You can stop receiving them at any time while in navigation mode by tapping the sound icon ![]() .
.
A long tap on the sound icon lets you choose one of the supported languages for voice instructions. You can also change the language in the Navigation Settings.
Read more on how to pair your devices with Bluetooth accessories:
Quick places
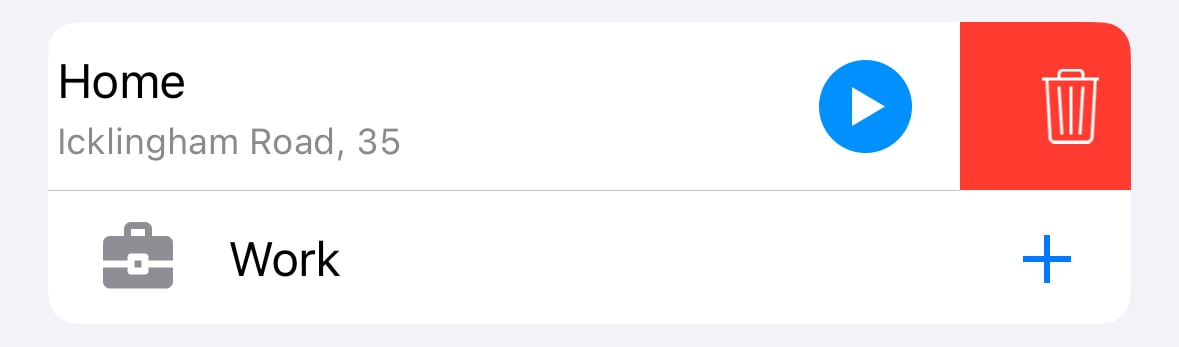
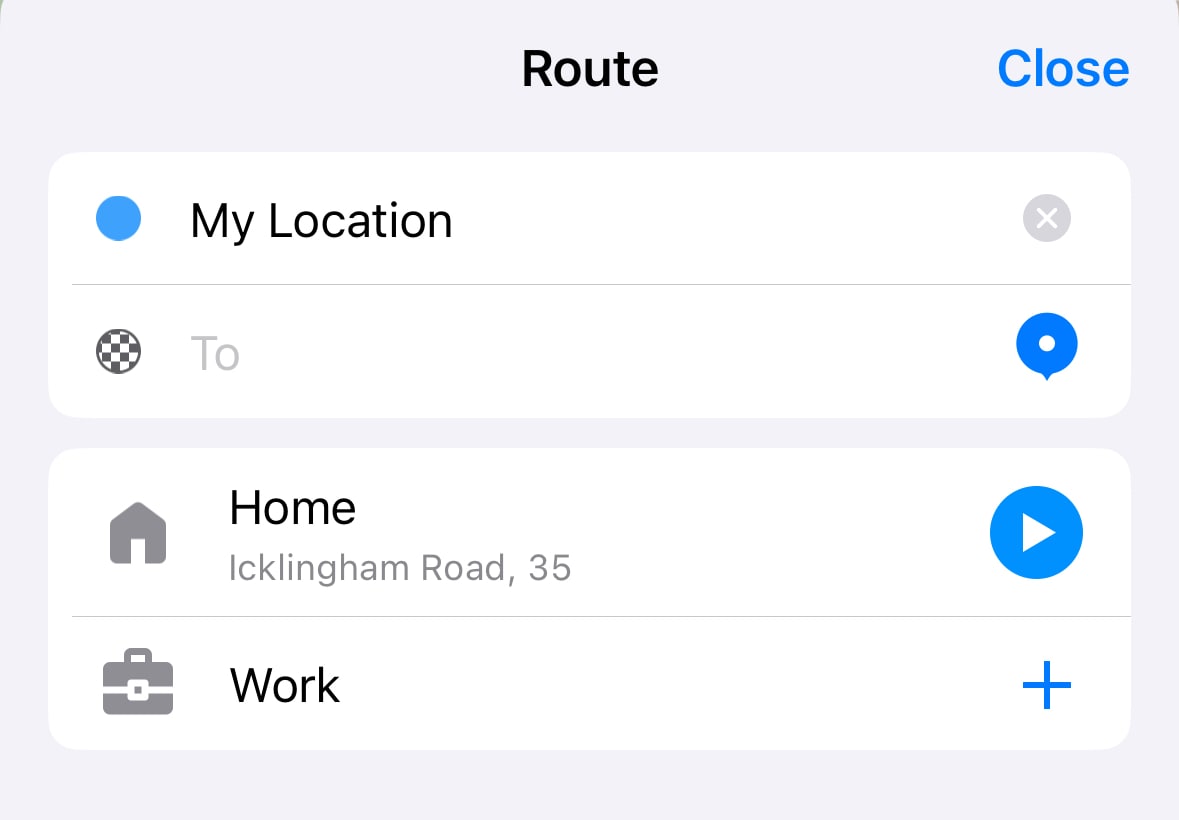
Guru Maps lets you save your Home and Work locations permanently so you can get directions to them quickly:
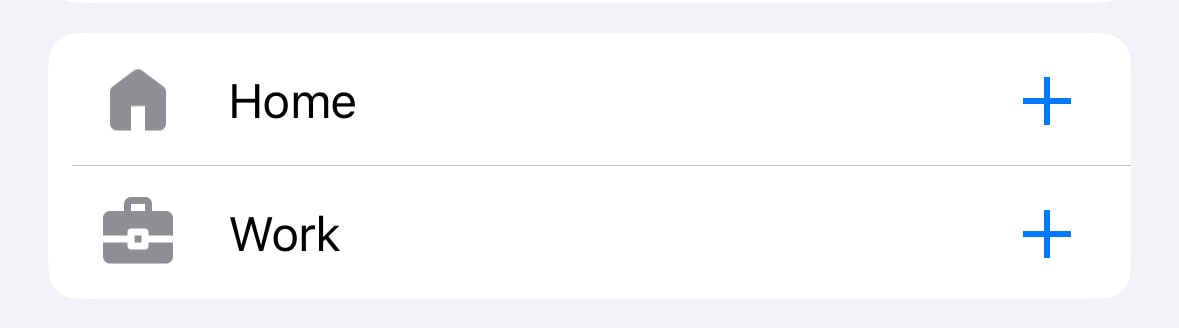
Add your quick places
- Tap the route button on the main map screen.
- Tap the
 button next to the Home or Work cell.
 - Set the address using a search or by selecting it on the map.
To make the route button visible on the main map, go to the Main Screen app settings menu and turn on the Routing button toggle.
Get directions to quick places
- Tap the route button on the main map screen.
- Tap the go
 button next to the Home or Work cell.
Change the address
To update a saved address, first delete the previous one and then set the new address. To delete the saved address, swipe the cell to the left and tap the delete button when it appears.