Settings
The Guru Maps app comes preloaded with a fully functional setup, but the app settings offer additional customization options for advanced users. These settings allow you to configure app options, purchase extra features, and manage the representation of map data.
Offline Maps Settings
In the app settings menu, you can find the Offline Maps section, which enables users to customize their preferences specifically for offline vector maps.
Download Maps
1. Download for offline use
To access the list of vector maps available by country and download them for offline use, follow these steps:
- Open the Guru Maps app and navigate to the settings menu.
- Locate the "Download Maps" option and tap it.
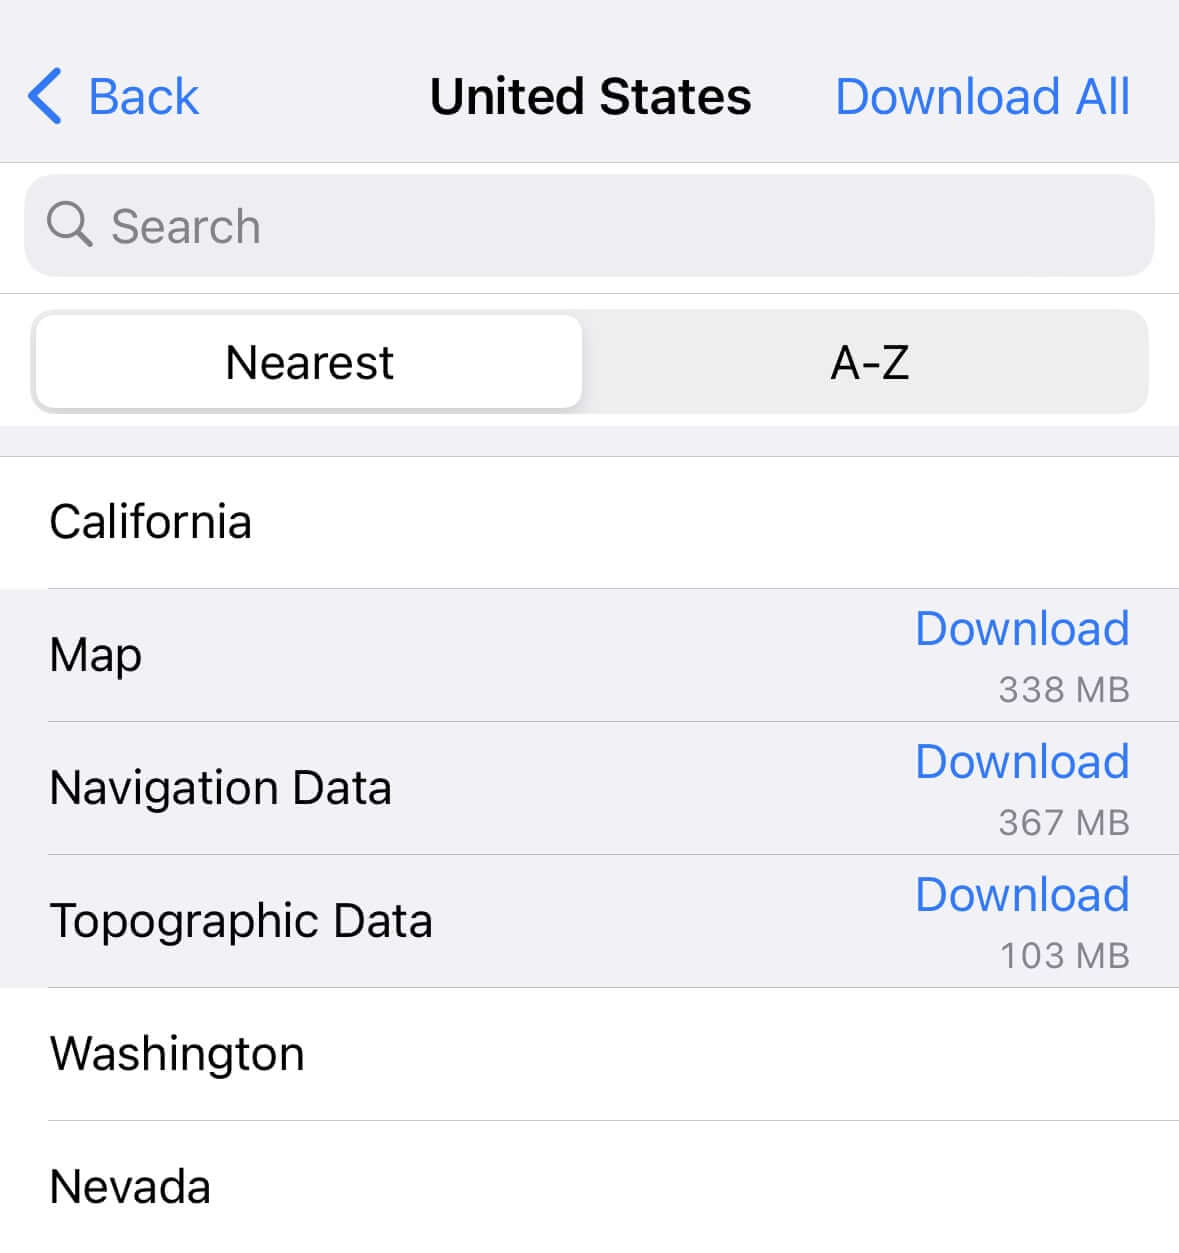
- Within the "Download Maps" screen, you will see a list of available countries.
- Tap the desired country or region to expand the options.
From here, you have the following choices:
- Download a Map: Download the map data for the selected country.
- Download Navigation Data: Download the necessary navigation data to use navigation features while offline.
- Download Topographic Data: Access topographic maps offline and enable overlays such as contour lines, slopes, and hillshades for additional detail on the basic map.
Downloading maps, navigation, and topographic data may require additional storage space on your device.
To pause a download, simply tap on the corresponding cell. Tapping it again will resume the download.
If you want to remove a download, swipe across the cell from right to left. Then tap the Delete button that appears, or use the Edit button in the top right corner of the screen.
2. Update maps and navigation data
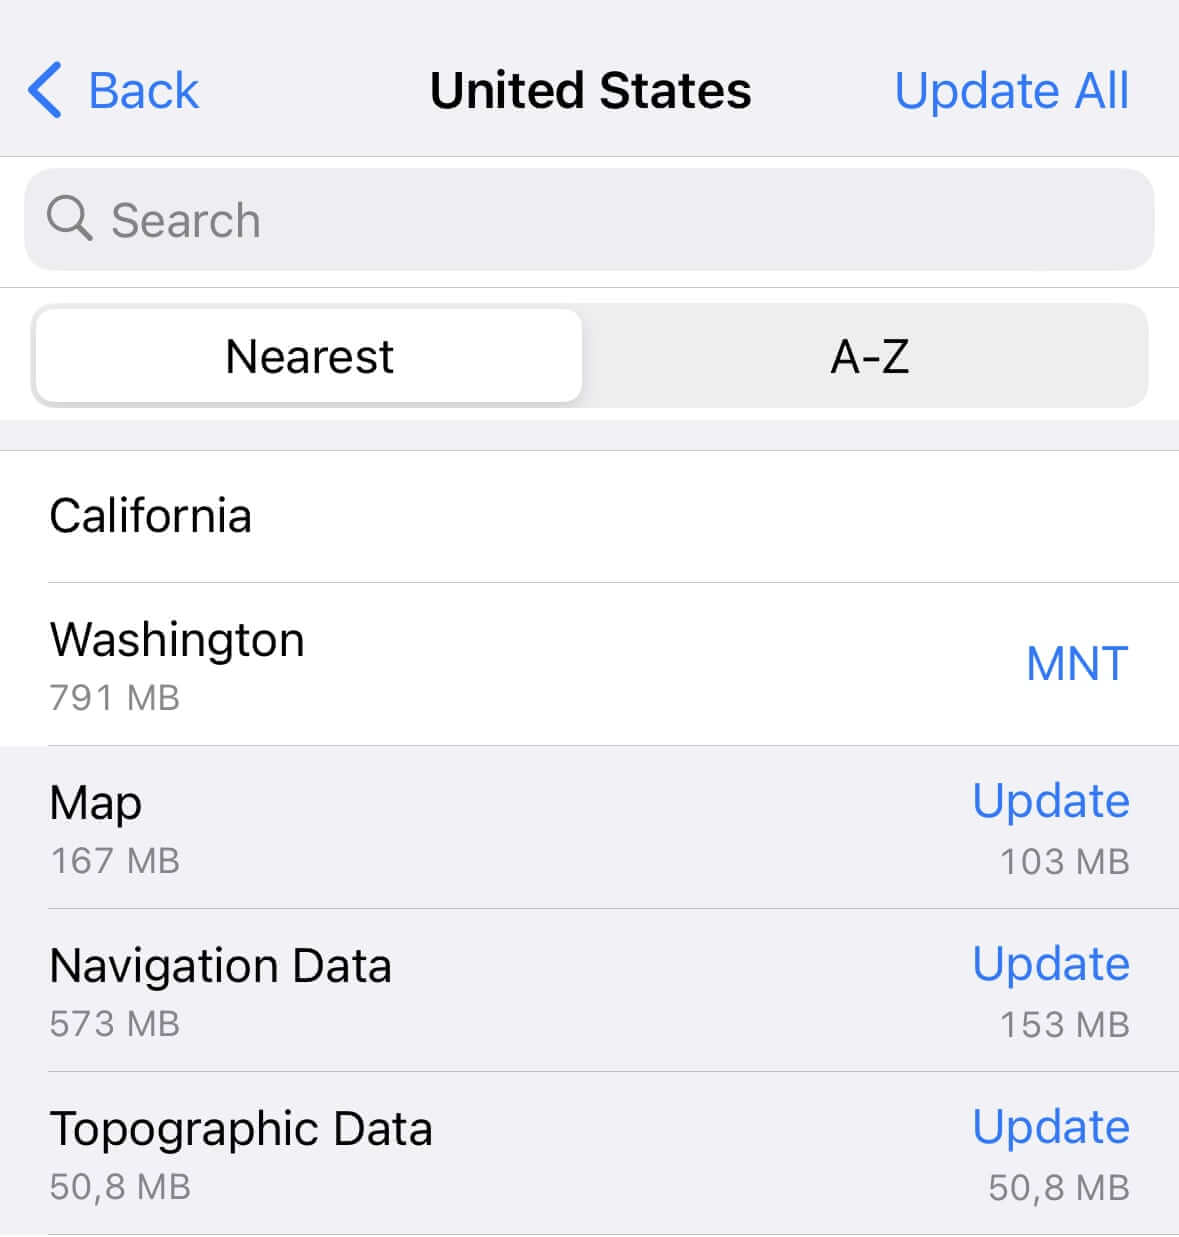
Since OpenStreetMap data is continuously updated by a global community of volunteers, map updates become available periodically within the Guru Maps app. All vector map updates are provided free of charge and are distributed automatically. If an update is available for a previously downloaded map, you will notice an Update button next to the map.
To update all of your downloaded maps, tap the Update All button. This ensures that you have the most up-to-date maps and navigation data at your disposal.
3. Share maps and navigation data
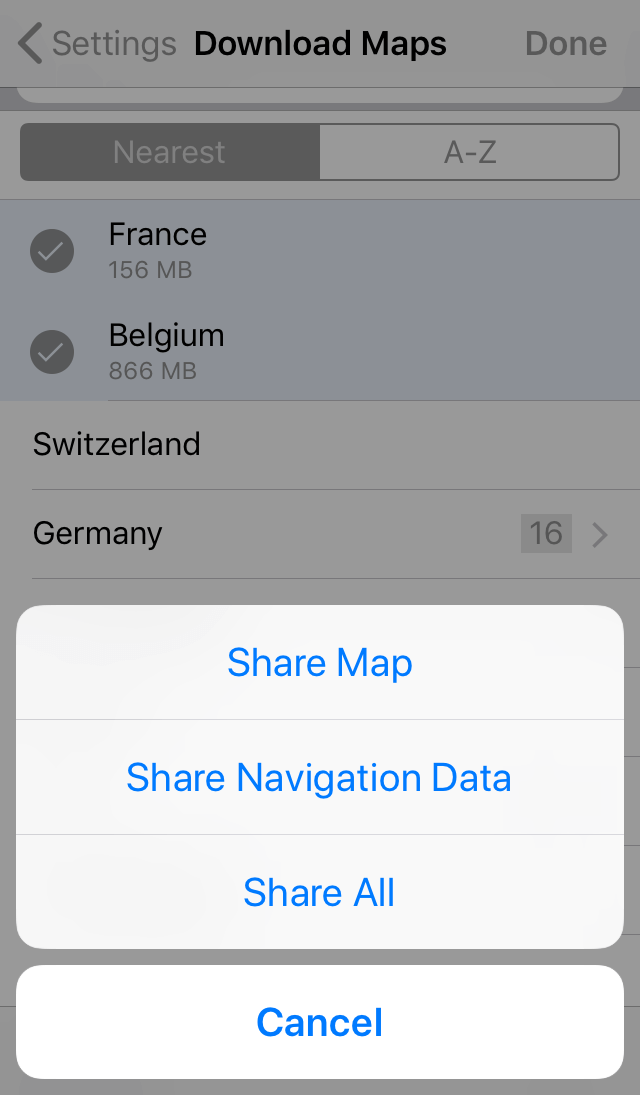
You can use AirDrop to share downloaded vector maps and offline navigation data between nearby devices even when you do not have an internet connection.
Map Objects
In addition to customizing the app's appearance, you can choose which objects to show on the vector map. Select only the points of interest that are relevant to you for a clean, clutter-free display:
- Banks, ATMs, currency exchanges
- Beauty salons, hairdressers
- Building names and numbers
- Entertainment, arts and culture
- Hospitals, clinics, pharmacy
- Hotels, hostels, campsites
- Monuments, places of worship
- Parking, gas and service stations
- Pistes and ski lifts
- Police, post offices, embassies
- Public transport stops
- Pubs, bars, clubs
- Restaurants, cafes, fast foods
- Shopping malls, supermarkets
- Sport complexes, leisure centres
- Tourist attractions
- Universities, colleges, schools
- Train and metro stations
Font and Language
Font Size
You can customize the text display on the offline vector map by adjusting the font size. To modify the font size settings, navigate to the app's settings menu and locate the "Font and Language" option. From there, increase, decrease, or change the default font size according to your preferences.

Preferred Language Order
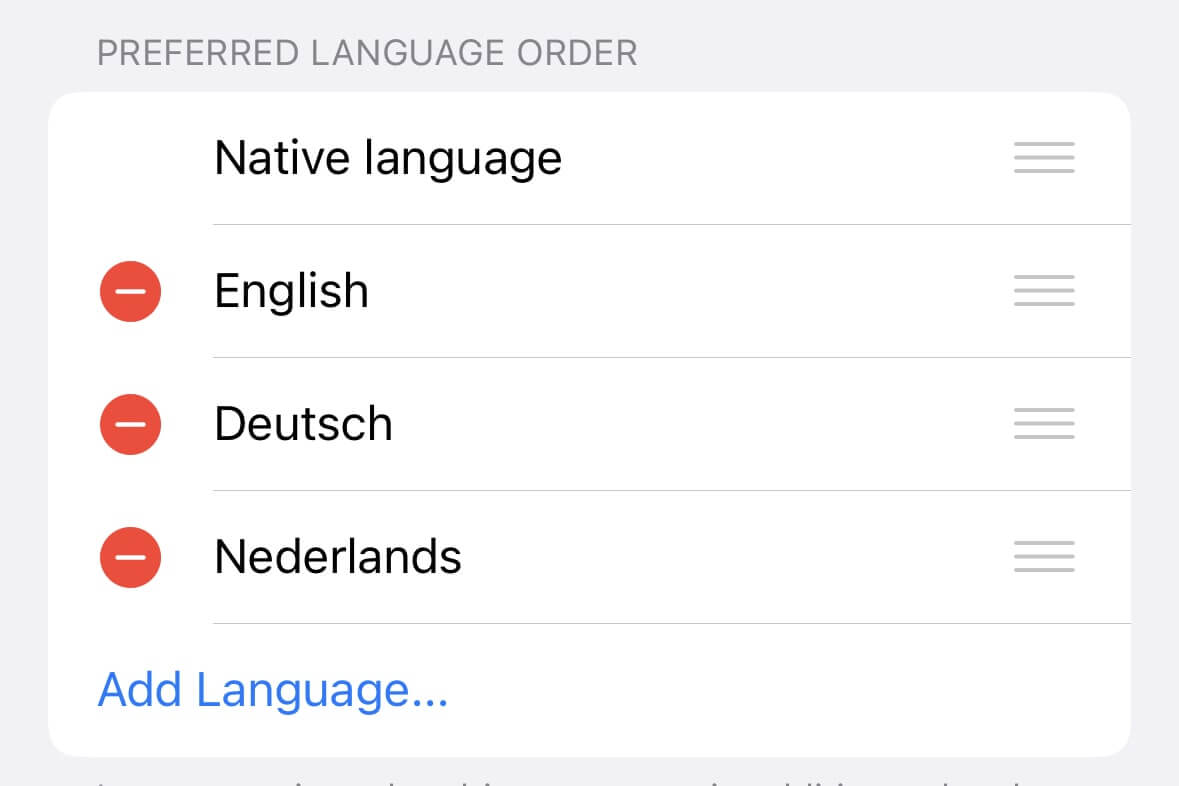
In certain regions, maps may display names of objects in multiple languages, alongside local names. If you have defined your preferred languages, the map will prioritize showing names in the first language on your list. This feature is particularly useful in multilingual countries like Belgium, where Dutch, French, and German share official language status.
To manage your preferred languages, tap the "Edit" button in the top right of the screen. Change the order by pressing the triple-line icon next to each language and dragging it to a different position. This allows you to rearrange or delete languages from the list according to your preferences:
Online Maps Settings
Within the app settings menu, you will find the Online Maps section, which lets you customize preferences specifically for online raster maps.
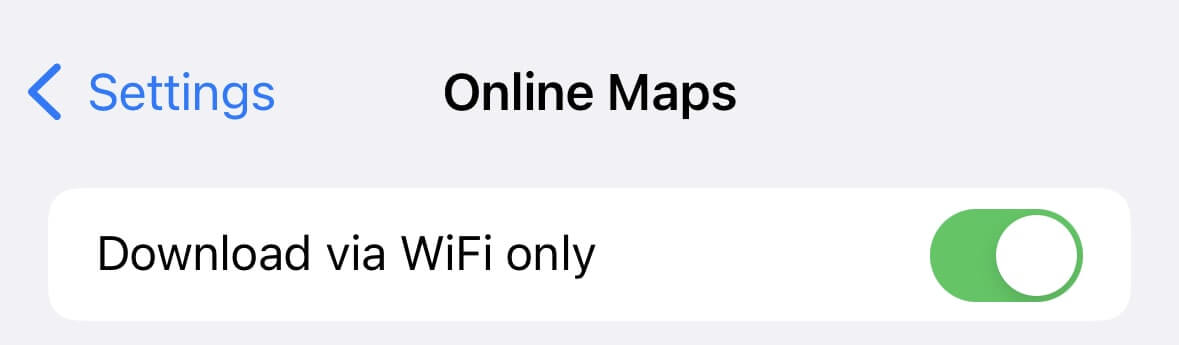
Mobile Data Usage
If you want to prevent Guru Maps from using your mobile data, toggle the "Download via WiFi only" option to the "ON" position.
When this option is enabled, Guru Maps downloads maps and data only when connected to a Wi-Fi network, preserving your mobile data.
Map Refresh
To adjust how often cached map tiles refresh for online maps, move the slider thumb in the "Map Refresh" section to set the desired time interval.
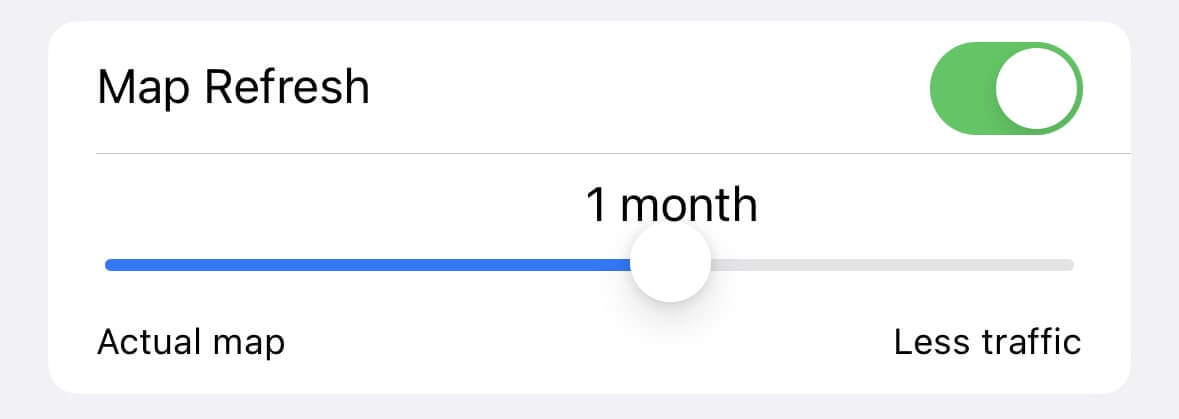
Tiles older than the selected duration are automatically re-downloaded when you browse online.
The map refresh setting applies to online raster maps only and does not impact offline vector maps.
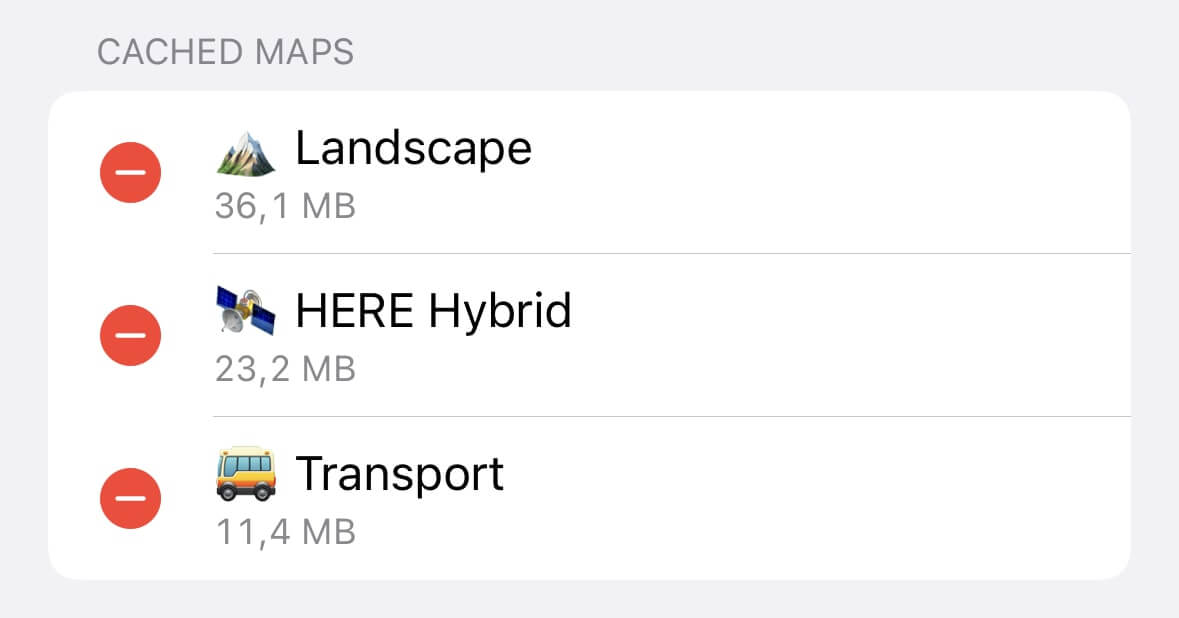
Cached Maps
As you browse the online map within the app, all the map tiles that load are automatically saved to your device's storage. If certain tiles are no longer necessary and you want to free up storage space, delete them from the "Cached Maps" section:
Appearance Settings
The "Appearance" settings group lets you customize the main map screen according to your preferences. Configure these options to determine how the map looks and which features are available to you.
Theme
To change the app theme, such as switching to a dark theme at night, choose one of the available options:
- Dark: Suitable for low light environments.
- Light: Bright white interface, set as the default.
- System: Automatically switches between light and dark based on the system mode.
For more information about using dark theme, you can read here:
Main Screen
The Main Screen settings group determines the appearance and functionality of the main app screen, where the map is displayed. You can customize the interface by adding or hiding buttons according to your preferences.
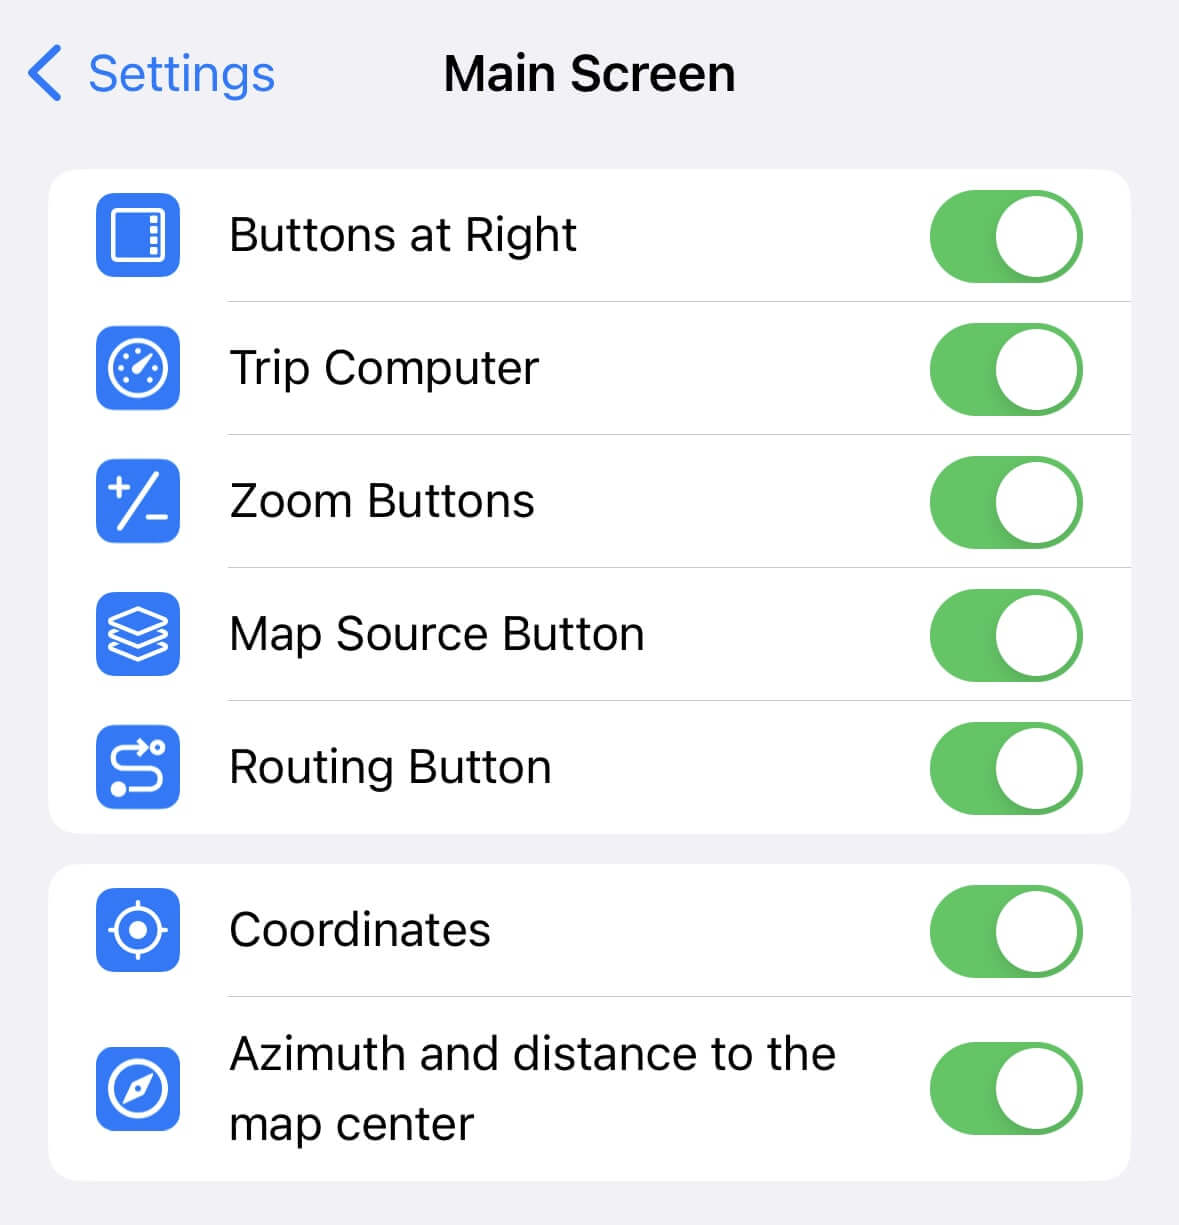
Buttons at Right
Enabling Buttons at Right repositions the major function buttons on the main map screen to the right side. This layout adjustment allows for easier selection of these buttons with a single finger.
Trip Computer
If you prefer a cleaner view of the main map without the Trip Computer panel, turn this option OFF.
Zoom Buttons
To control the zoom level on the map more conveniently, enable the Zoom Buttons option. When turned on, the zoom control buttons, consisting of a plus and minus symbol, are displayed on the map interface so you can adjust the zoom level quickly.
![]()
Map Source Button
Enabling the Map Source button lets you switch between different map styles or online sources directly on the main map view. Once enabled, the ![]() button is visible on the interface, giving you quick access to various map sources without navigating through additional menus.
button is visible on the interface, giving you quick access to various map sources without navigating through additional menus.
Routing Button
Enabling the Routing Button adds a quick option to access the route planner feature directly from the main map view. Once enabled, the ![]() button is visible on the interface, allowing you to open the route planner with a single tap.
button is visible on the interface, allowing you to open the route planner with a single tap.
Coordinates
Enabling the Coordinates option displays the coordinates, current zoom level, and altitude below the scale ruler on the main map view, along with "crosshairs" at the center of the map.

Azimuth and distance to the map center
Enabling the Azimuth and distance to the map center option displays the direction and distance from your location to the map center.

Tracks and Markers
The Tracks and Markers settings group allows users to personalize the appearance of their data.
Direction arrows on track
Toggle the visibility of direction arrows on the track. When enabled, direction arrows will be displayed, providing visual cues for navigation along the track. Disabling this option will remove the arrows from the track display.
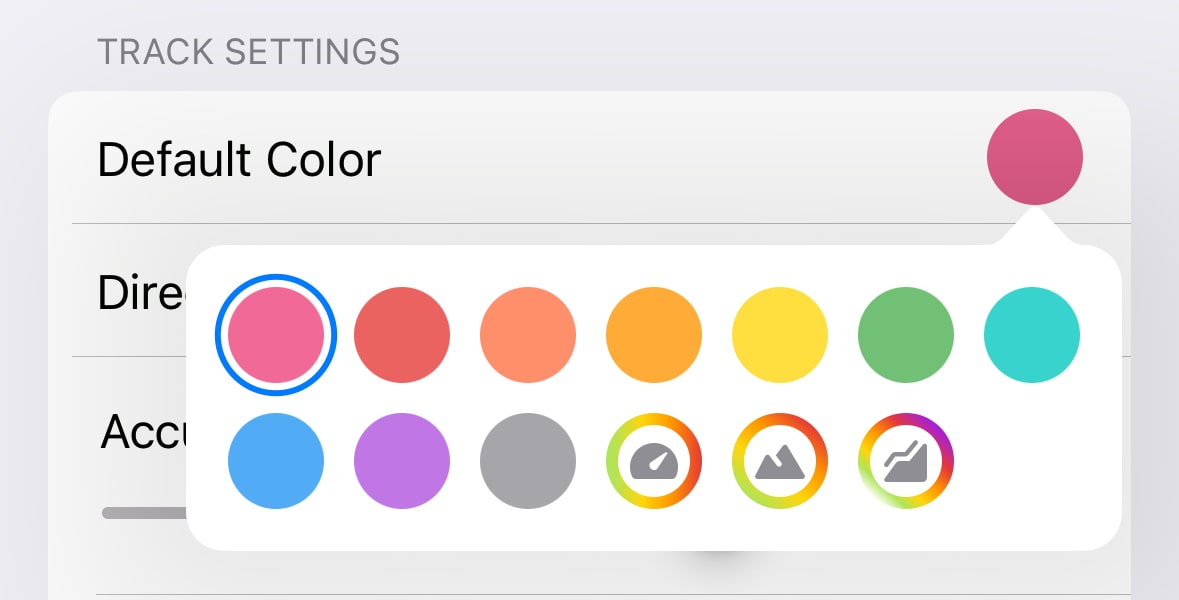
Default track style
Choose the default line style for newly recorded and imported GPS tracks. You can choose from the following options:
- Solid Color: Assigns a consistent color to the track line.
- Speed Gradient: Applies a gradient effect to the track line based on speed, creating a visual representation of varying speeds along the track.
- Altitude Gradient: Implements a gradient effect on the track line based on altitude, offering a visual depiction of elevation changes throughout the track.
GPS filtering
The selected GPS filters will be applied by default to newly recorded and imported GPS tracks.
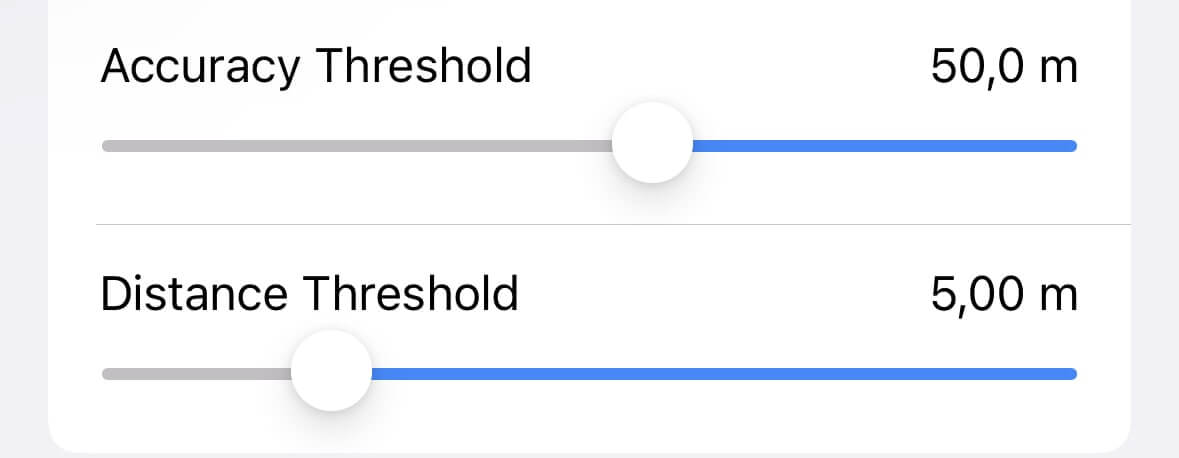
Accuracy Filter: Set the minimum accuracy required for the received GPS points. Points with accuracy outside the specified threshold will be filtered and not displayed in the track.
Distance Filter: Specify the minimum distance between consecutive points in a recorded track. Points that are closer together than the specified distance will be filtered and excluded from the track display.
Read more: Track Details
Default Icon
The Marker Settings section allows you to assign a specific category to markers, which will determine the default icon for newly created and imported points.
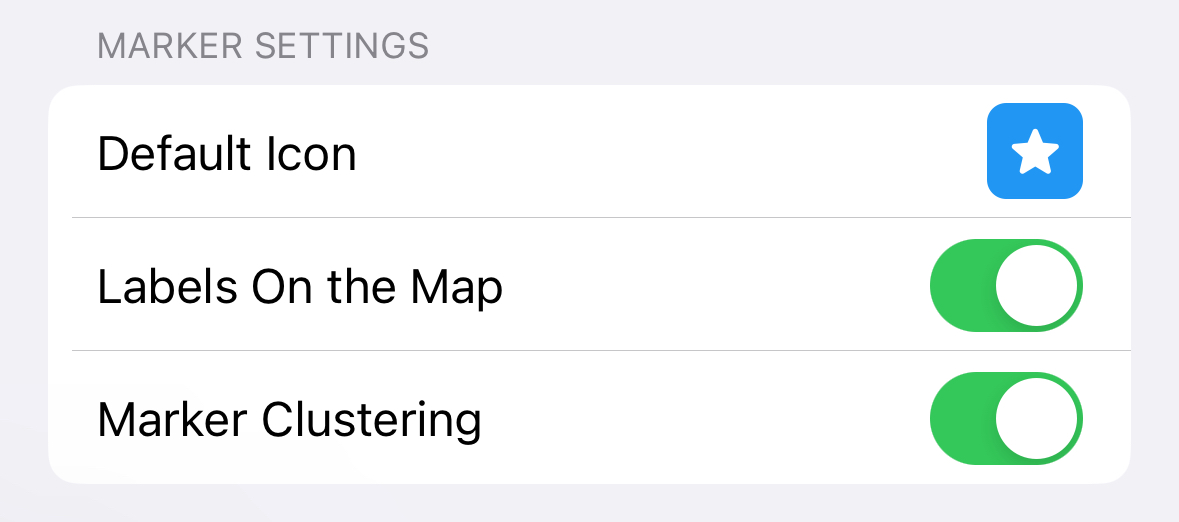
This helps you visually distinguish and organize different types of markers on the map:
Marker Names
To display a marker name on the map, turn the Labels on the Map option ON. The marker icon updates to show the name above it, and you can rename the bookmark as needed:
 →
→ 
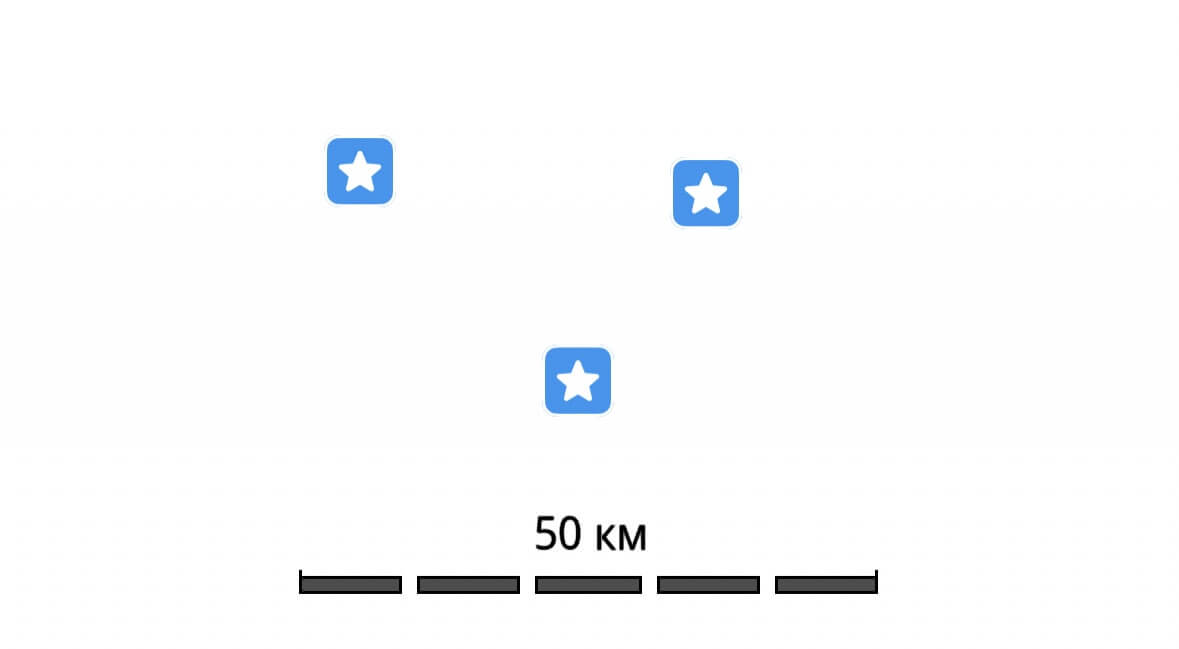
Marker Clustering
The Marker Clustering setting controls how markers display when multiple points of interest are close together.
When Marker Clustering is enabled, nearby markers are grouped into clusters. The number on each cluster icon indicates how many markers it contains:
 →
→ 
Screen Auto-Lock
By default, your device's screen turns off after a period of inactivity to conserve battery power. Turn this option OFF to keep the screen awake while using Guru Maps.
Navigation Settings
General Options
Use these navigation settings to tailor the app to your preferences, regardless of the selected mode:
- Voice Instructions: The system language of your device determines the default navigation voice. Choose from 25 languages to set your preferred voice guidance.
- Map Auto-Zoom: Enable this option to let the app adjust the map scale automatically based on your speed during navigation.
- Auto-record track during navigation: Enable this option to save completed routes as GPS tracks in your collections automatically.
- Use navigation online: Enable this option to build routes online first. When you have an internet connection, the app uses online resources to calculate routes with up-to-date information. If there is no internet connection, the app automatically switches to offline navigation data (if downloaded).
Vehicle Options
Choose the settings that match your mode of travel—car, pedestrian, cycling, motorcycle, truck, or straight line—to optimize your navigation experience:
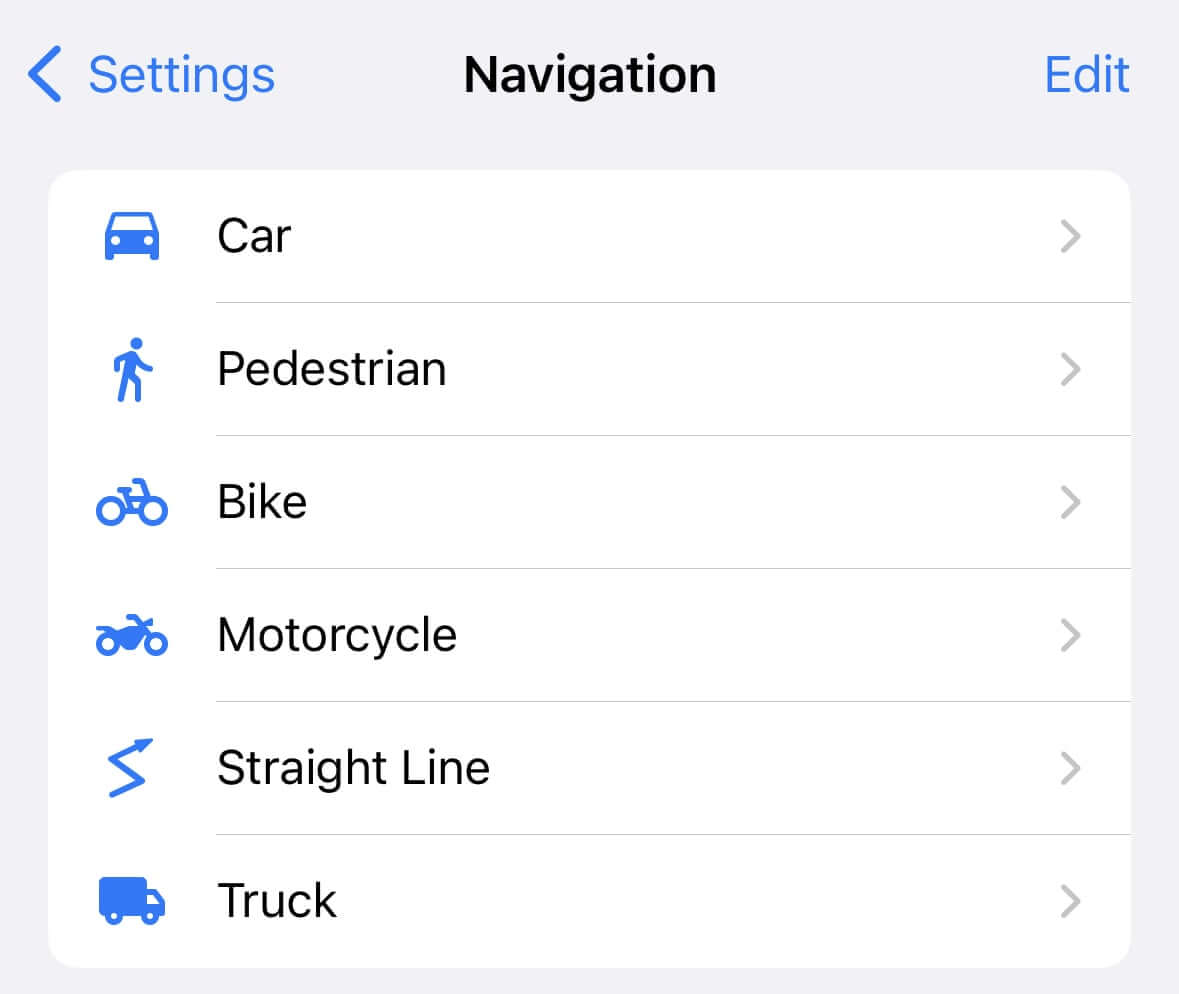
Swipe a navigation mode cell from right to left to hide it when building a route. This keeps the interface focused on the modes you use most.

To show hidden navigation modes again, tap Add Navigation Mode... and select the modes you want to display.
Car
These options allow you to optimize your car navigation routes with Guru Maps by choosing to avoid tolls, highways, or ferries:
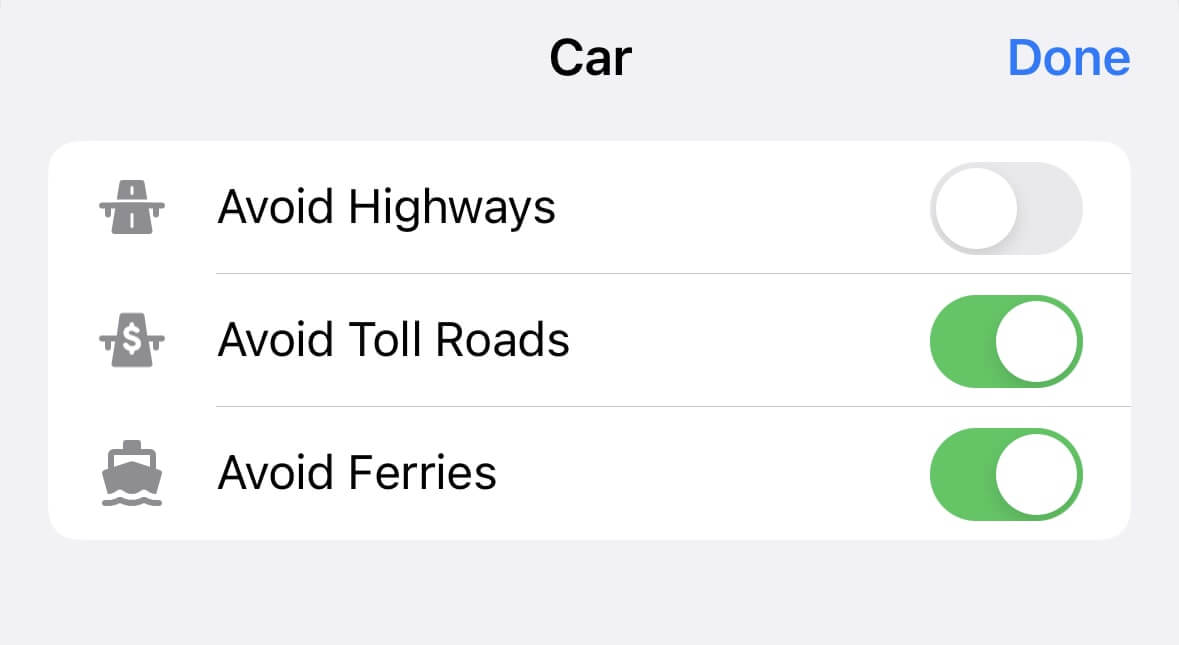
- Avoid Highways: This option allows the app to generate routes that prioritize local roads and avoid highways as much as possible.
- Avoid Toll Roads: This option ensures that the app calculates routes that steer clear of toll roads, providing toll-free alternatives when available.
- Avoid Ferries: This option ensures that the app plans routes that exclude ferry crossings, offering alternative routes that bypass ferry routes.
Please note that enabling these avoidance options may affect the overall duration and distance of your routes, as alternative roads and routes will be considered.
Pedestrian
Use these options to tailor walking routes by avoiding stairs, alleys, or ferries:
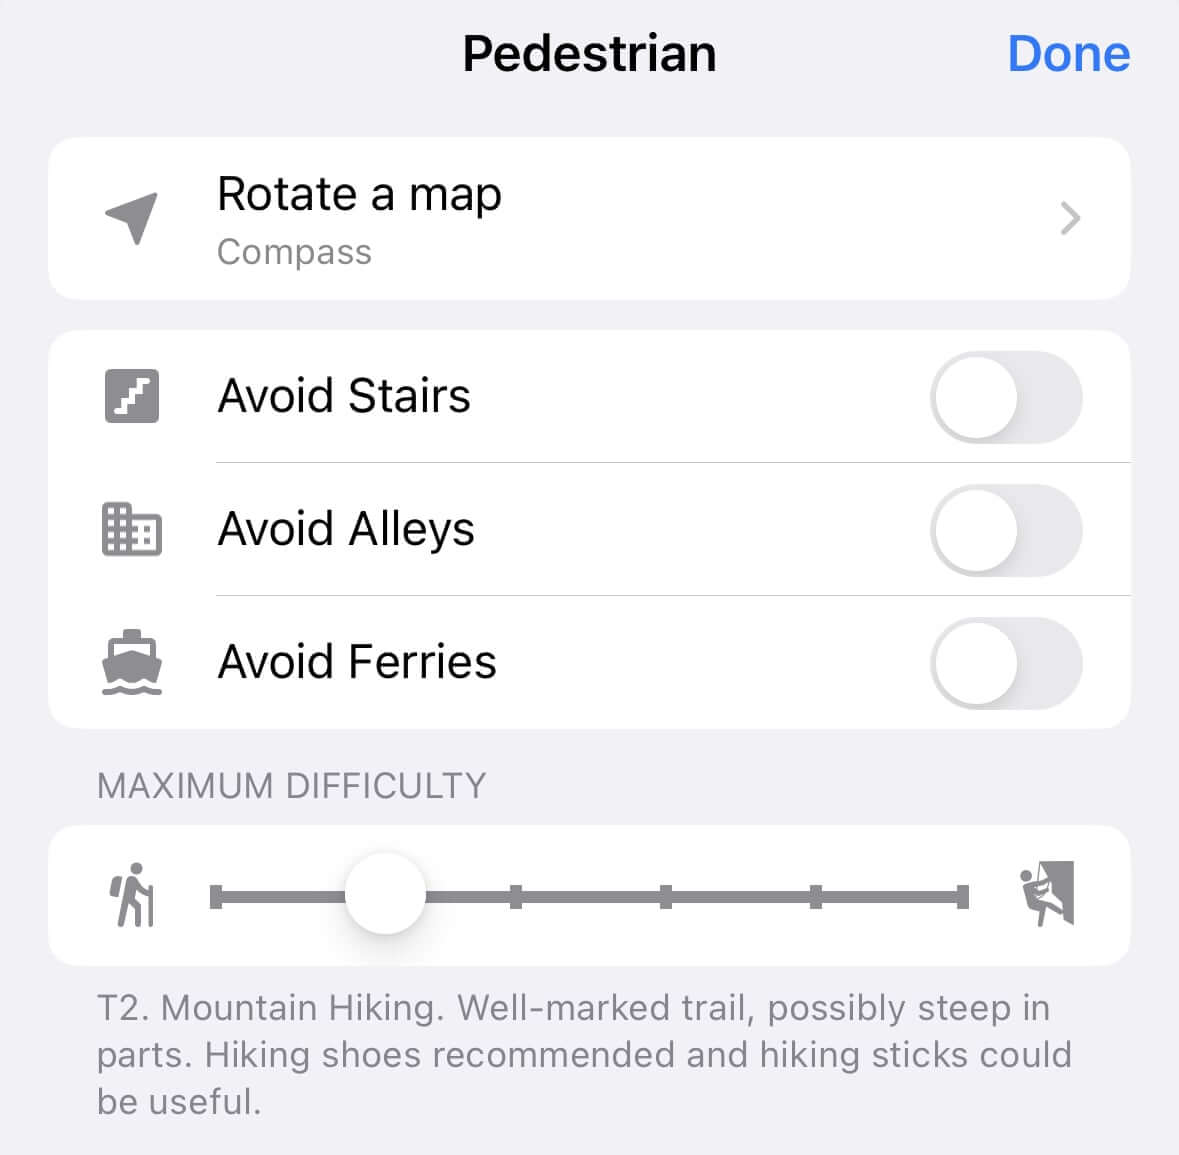
- Rotate a Map: Choose whether the map rotates automatically based on the compass or GPS while you're navigating.
- Avoid Stairs: Generate routes that minimize or exclude stairs.
- Avoid Alleys: Steer clear of narrow or less-traveled alleyways.
- Avoid Ferries: Exclude ferry routes from your trip.
- Maximum Difficulty: Set the desired hiking difficulty based on the SAC Hiking Scale.
Read more about hiking trail difficulties: https://gurumaps.app/blog/2023/04/15/hiking.
Bike
Customize cycling routes with the following options:
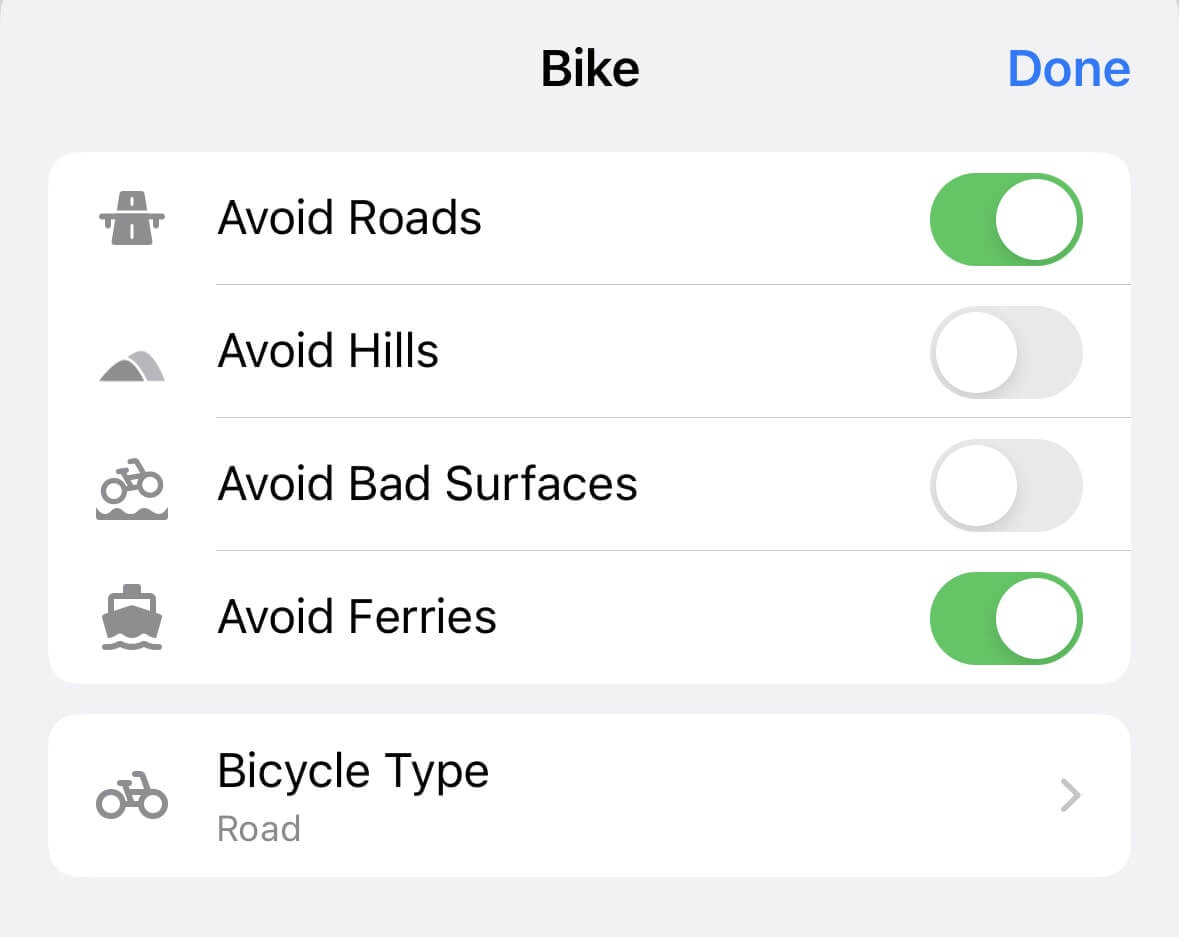
- Avoid Roads: Prioritize routes with bicycle lanes or cycleways for a safer ride.
- Avoid Hills: Favor flatter routes by minimizing steep inclines, even if the trip becomes longer.
- Avoid Bad Surfaces: Skip roads or paths with poor surface conditions in favor of smoother options.
- Avoid Ferries: Exclude ferry crossings from your route.
- Bicycle Type: Select the type of bicycle you are using for more accurate route calculations. The default type is Hybrid.
Road: a road-style bicycle with narrow tires that is lightweight and designed for speed on paved surfaces.
Hybrid or City: a bicycle built for city riding or casual trips on roads and paths with good surfaces.
Cross: a cyclo-cross bicycle similar to a road bicycle but with wider tires suitable for rougher surfaces.
Mountain: a mountain bicycle suited to most surfaces but generally heavier and slower on paved roads.
Motorcycle
When using Guru Maps for navigation during motorcycle trips, you have the option to customize the settings to optimize your riding experience. Here are the key navigation settings available for motorcycle travel:
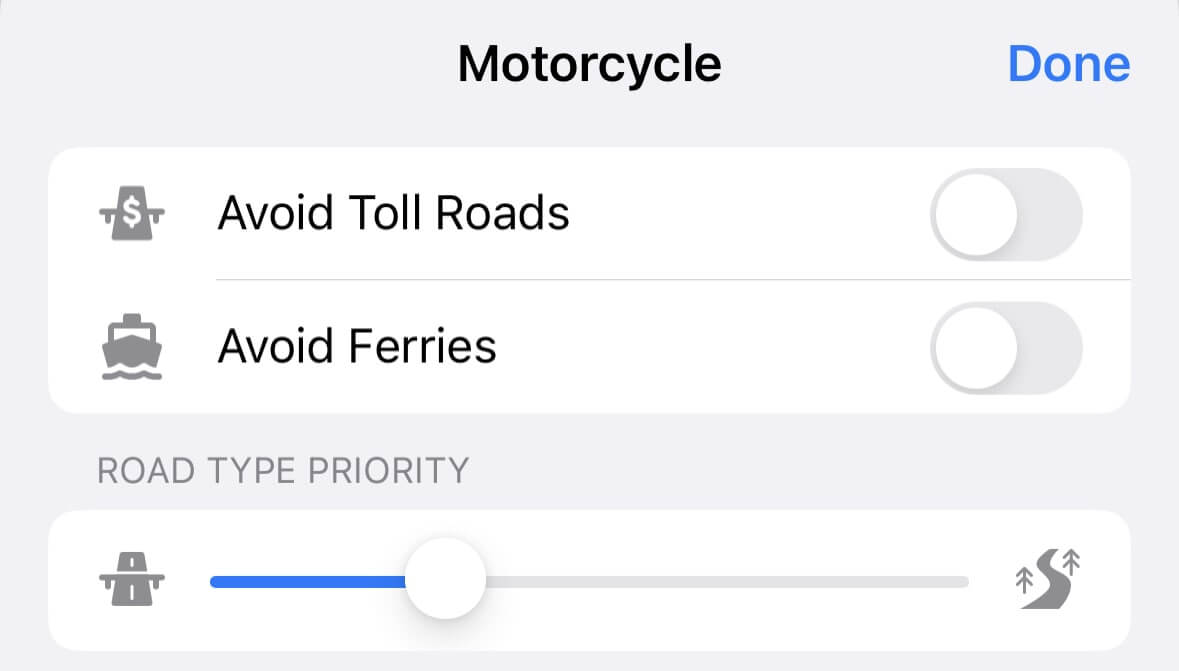
- Avoid Toll Roads: Enable this setting to generate routes that prioritize roads without tolls, ensuring a more cost-effective trip.
- Avoid Ferries: Enable this option to exclude ferry crossings from your motorcycle routes.
- Road Type Priority: Choose whether to prioritize highways or country roads when building motorcycle routes.
In a Straight Line
Use straight-line navigation in areas without defined roads or trails. Two options help tailor the experience:
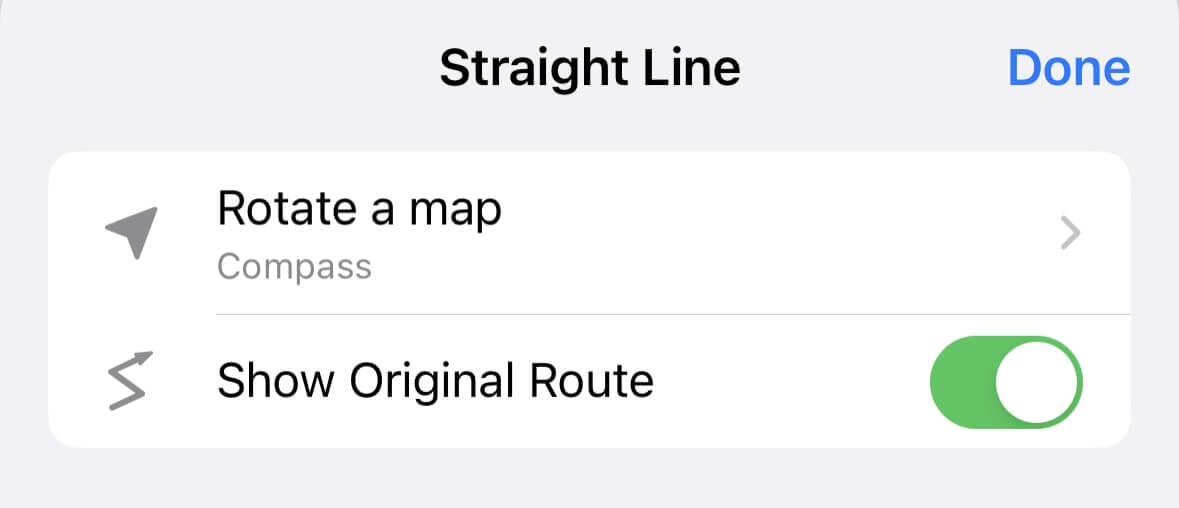
- Rotate a Map: Choose whether the map rotates automatically based on the compass or GPS while you're navigating.
- Show Original Route: View the original route as a dashed line connecting your current location to the destination if you deviate from the planned path.
Truck
When using Guru Maps for truck navigation, you can customize the settings to optimize your routes based on truck-specific requirements. Here are the key navigation settings available for truck navigation:

- Avoid Highways: Prioritize local roads and avoid highways when possible—useful if restrictions apply because of vehicle size or weight.
- Avoid Toll Roads: Steer clear of toll roads whenever alternatives exist.
- Avoid Ferries: Exclude ferry crossings in favor of land-based routes.
- Maximum Speed: Set the maximum speed of your truck so the app accounts for appropriate speed limits.
In addition to the basic navigation settings, Guru Maps also allows you to input custom dimensions and attributes for your truck. These parameters help the app calculate routes that take into account the specific restrictions and requirements of your vehicle:
- Vehicle Length: Enter the length of your truck so the app can avoid roads with restrictive turns or length limits.
- Vehicle Width: Specify the width to steer clear of roads that are too narrow.
- Vehicle Height: Input the height to avoid low bridges, tunnels, or other obstacles.
- Vehicle Total Weight: Enter the total weight, including cargo, so routes comply with weight restrictions.
Data Backup
Guru Maps offers an easy way to back up data on your device, ensuring your information stays safe and reducing the risk of accidental loss.
By regularly creating backups of your collections, you can safeguard your important geodata and easily restore it in the event of data loss or device migration.
Create backup
To create a backup of your collections within the app, follow these steps:
- Open the Guru Maps app on your device.
- Go to the Settings menu and select the Data Backup option.
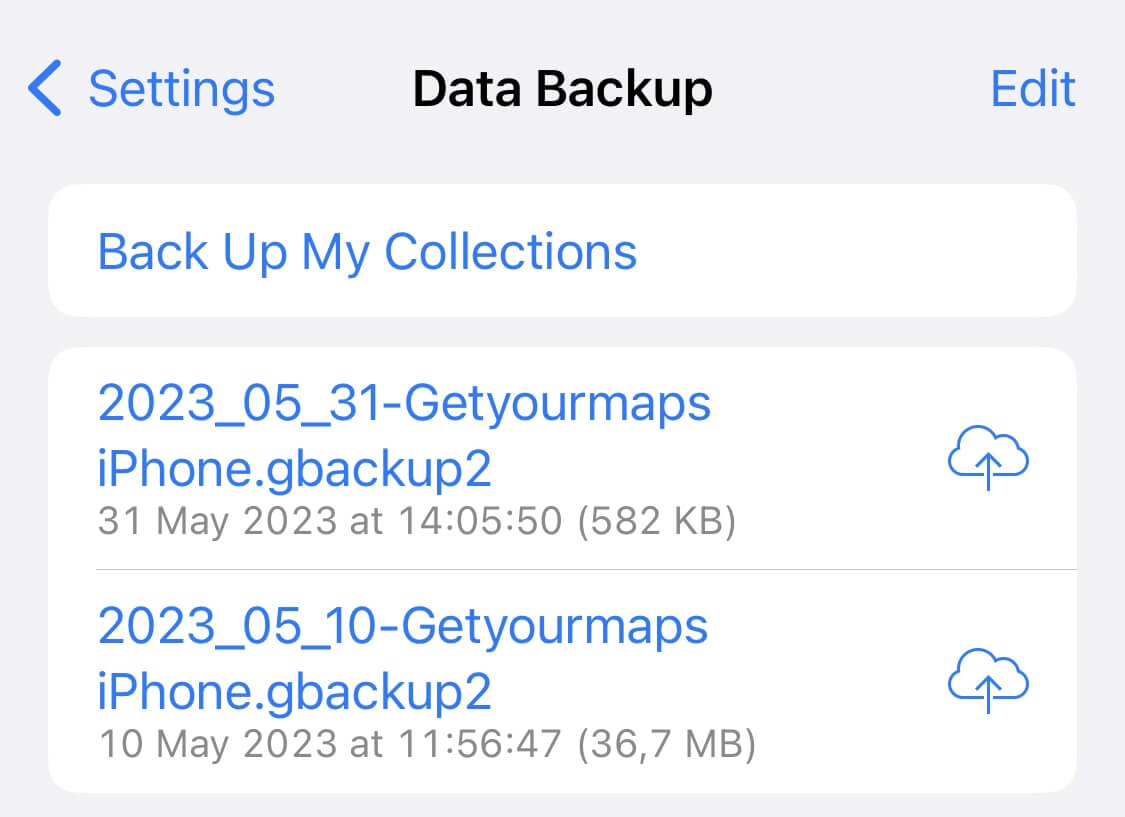
- Locate and tap the Back Up My Collections button.
- The backup process will begin, and you will see the progress on the screen.
- Once the backup is completed successfully, you will see the name of your device along with the date and time the backup was created.
When you initiate a backup in Guru Maps, please note that the backup process will only include data from your My Collections, which consists of bookmarks and GPS tracks. This ensures that your saved locations and recorded tracks are backed up and can be easily restored if needed. However, it's essential to be aware that downloaded offline maps and cached online maps are not included in the backup.
Save backup
Backup files are stored on your device and are automatically deleted when the app is uninstalled. Periodically copy .gbackup2 files to another location—such as a computer, external drive, or cloud storage—to keep them safe.
Tap the ![]() icon to save the backup and choose your preferred storage option.
icon to save the backup and choose your preferred storage option.
Restore from a backup
Before proceeding with the restoration process, it is important to note that restoring from a backup will overwrite all existing markers and GPS tracks in your My Collections. Please ensure that you have made a backup of your current data if you wish to preserve it.
If you have previously created a backup of your Guru Maps data and want to restore it, follow these steps:
- Locate the backup file with the
.gbackup2extension that you created earlier. This file should be stored in a location accessible on your device. - Tap on the backup file to open it, then tap the
 icon.
icon. - From the available options, select the Copy to Guru Maps option.
Units Format
To customize the units system and coordinate format in the Guru Maps app, follow these steps:
- Open the Guru Maps app on your device.
- Go to the Settings menu and select the Units Format option.
Units system
In the Units System section, choose the units of measure you prefer for distance and speed. The available options are:
- km — for kilometers and km/h,
- mi — for miles and mph,
- NM — for nautical miles and kts.
Coordinates format
In the Coordinates Format section, select the format in which you want to display your coordinates. Guru Maps offers several coordinate formats, including:
- +40.730598, -73.986580 (DDD.DDDDD)
- 40°43'50.1" N, 73°59'11.6" W (DDD°MM' SS.S")
- 40°43.835' N, 73°59.194' W (DDD°MM.MMM’)
- 40.73060° N, 73.98658° W (DDD.DDDDD°)
- 18TWL 85577 09345 (MGRS)
- 87G7WR9G+3Q (Plus codes)
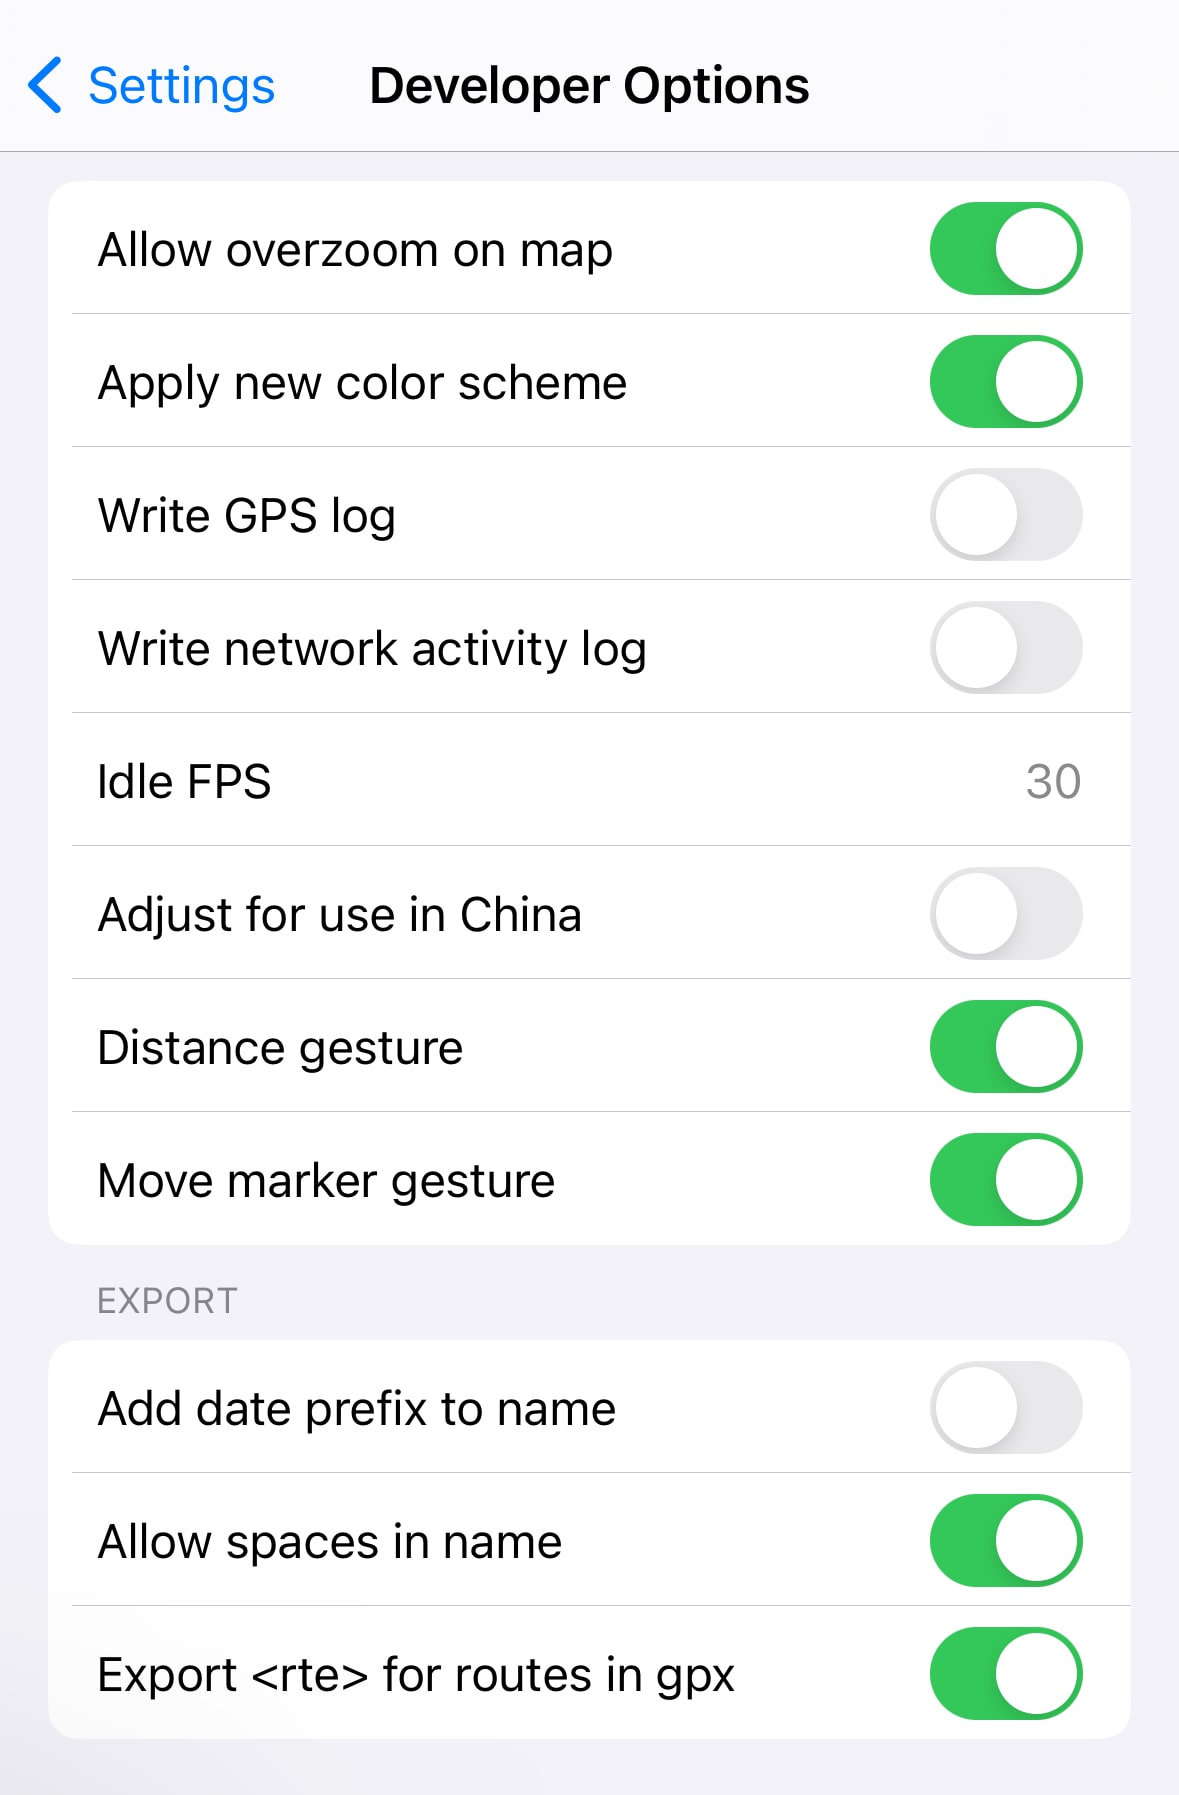
Developer Options
Guru Maps includes several hidden settings for advanced use. To access them, follow these steps:
- Open the Guru Maps app on your device.
- Go to the application settings.
- Scroll down to the very bottom of the settings page.
- On the line with the version number, tap it five times consecutively.
- A new menu item called Developer Options will appear in the settings menu.
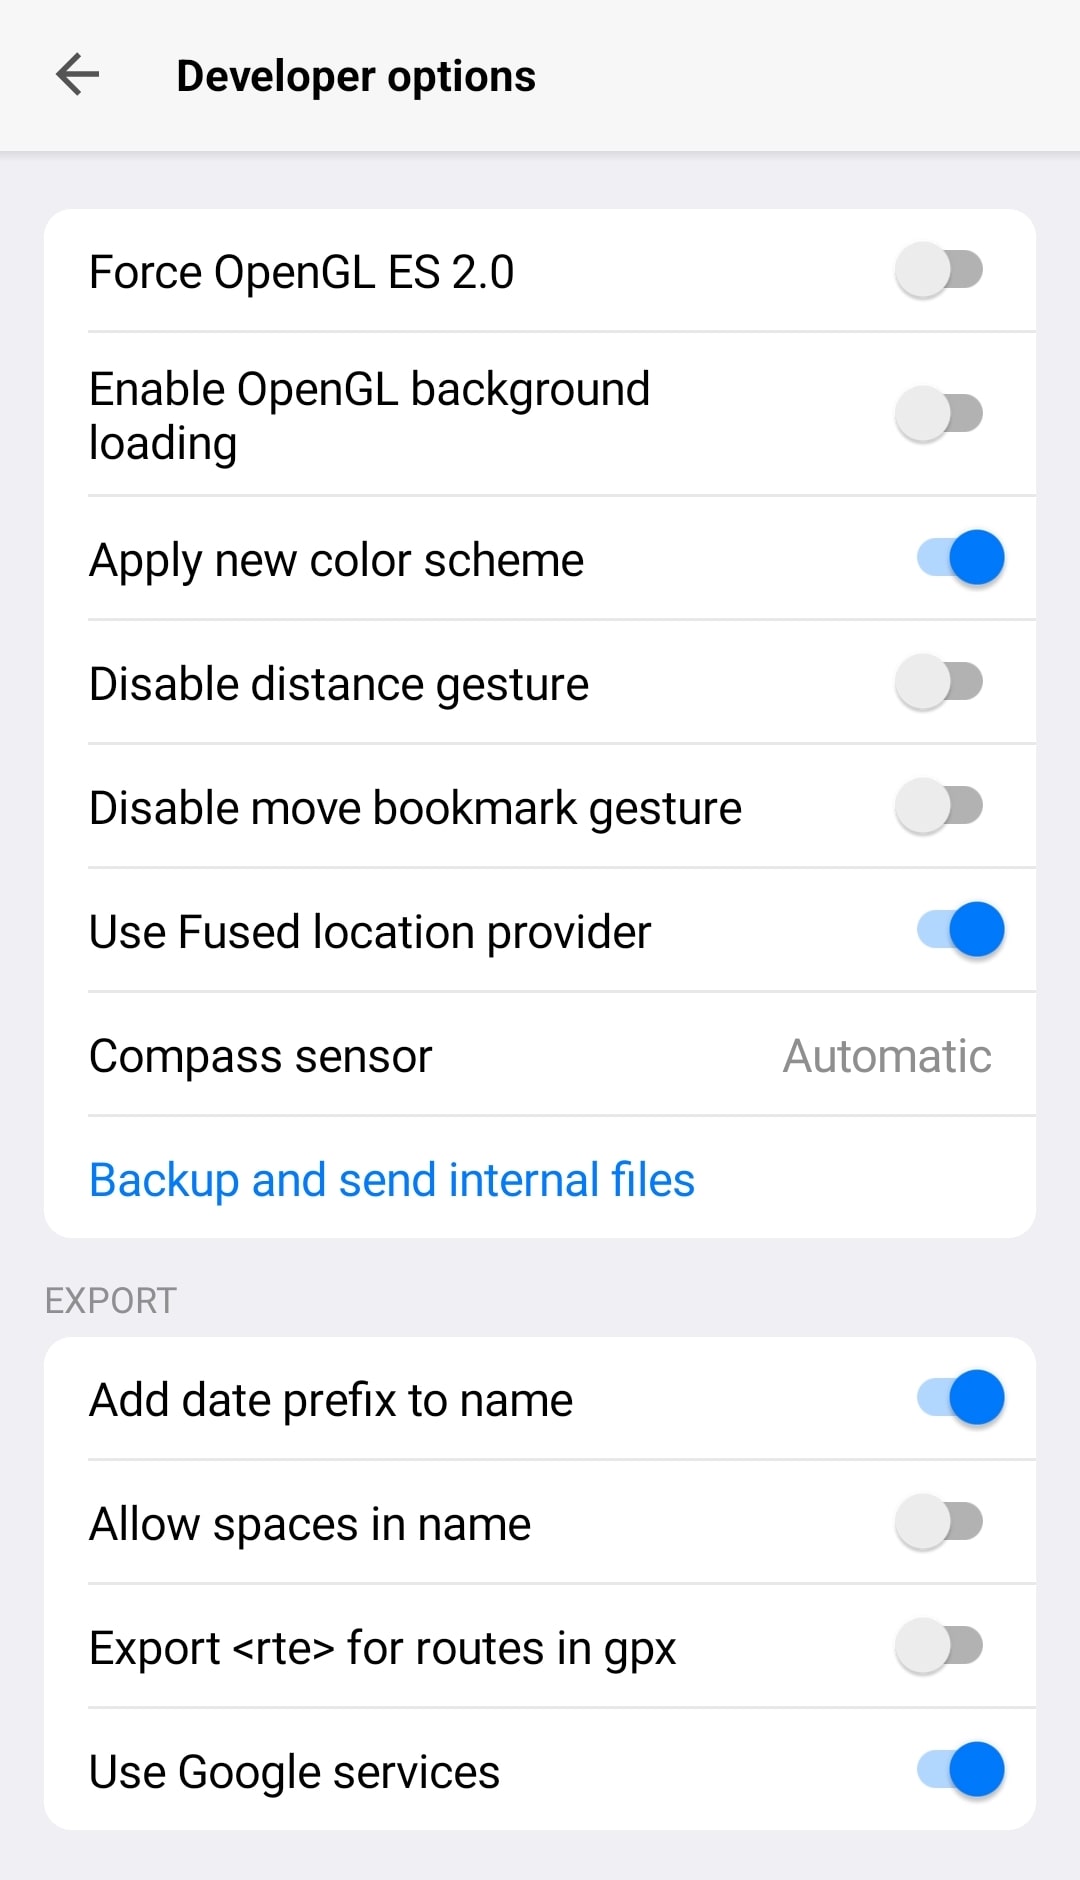
The "Developer Options" menu is intended for advanced users or developers who may require additional configuration or troubleshooting tools. These settings are not recommended for regular use because they can affect the app's behavior and stability.
- iOS
- Android
If you are unsure about any option in the "Developer Options" menu, contact the Guru Maps support team for guidance before making changes.